
Top 10 Super Simple Ideas to Live and Craft Greener
Top 10 Super Simple Idea to Live and Craft Greener

Top 10 Super Simple Ideas to Live and Craft Greener
18th February 2021
Last year Craft Box Club went plastic free and this year we’re aiming to make a positive environmental impact by supporting the planting of urban trees, using carbon negative printing and cutting even more plastic from our supply chain!
I also wanted to make sure that I live the eco message at home, so I’m true to my vision and also because I run Craft Box Club from home, the business and my life are pretty much intertwined. I was really surprised how easy some of these eco swaps were, sometimes even getting better products whilst saving you money! I want to share these with you so we can all work together to make a greener planet!
Top 10 ideas for…
…a greener life
Switch to a green energy tariff - I used Uswitch to find a green energy tariff and it was sooo easy! My energy now all comes from wind power. It’s pretty complicated how it actually all works but buying a green tariff is at the very least a positive vote for climate action.
Eat less meat - As well as being planet positive, this is also a brilliant money saver and has really helped reduce my food waste. Save that extra cash or spend it on some better quality, more adventurous veg!
Get your food plastic free - I switched to getting all of my veg from Riverford a couple of years ago and never looked back. It’s super low on packaging and amazing quality! This is just a top company and I just love their whole ethos!
Plant more trees - Trees help prevent climate change and just make the world a better place to live. We’ve started supporting a local project to plant more urban trees this year. Find out more here. You can also use sites like ecologi.com to use tree planting to offset your own carbon emissions.
Support green businesses - There a loads of other eco businesses out there right now. Look out for eco credentials when you make your next purchase. Think packaging, product and projects. Are you just paying for plastic? Will the product last and is it made from good stuff? Is your purchase supporting the kind of planet you want to see?
Google green - Set www.ecosia.org as your default search engine. Every search plants a tree!
Green your kitchen - I’ve used sponges in a couple of the past craft projects. I was amazed to discover that you can get sponges made from plant fibres. Super easy! You can also get material ones that you wash and reuse again and again. Check out www.ecofriendlystuff.co.uk for loads more eco swaps.
Choose eco subscriptions - Subscriptions really show that you care and repeat business really helps to support the kinds of products that you want. My faves are whogivesacrap.org and smol.
Make your own stuff - OK yes you know we’re all about the making! If you’re new to making, start with small handmade cards or gifts. It feels amazing for someone you love to put even a small bit of effort into crafting something just for you. It doesn’t need to be a masterpiece, it just needs to be made by you!
Look after your stuff - always buy reusable over single use and treasure your belongings. Even better, try to buy things that are specifically made to be repaired. If you have the money, brands like Dulait and Barbour design with easy repair in mind. Choose reusable bags and masks over their throwaway alternatives!

Top 10 ideas for…
…greener crafting
Understand your materials - Some plastics are hidden! If you can, swap acrylic paint and yarn for non-toxic versions. I use powder paint and merino wool and have cut all acrylic from my boxes this year!
Reduce waste - It’s so easy to get over excited and order loads of the wrong thing. Oh no the needle is too small, the yarn doesn’t fit the hook, this paint isn’t the colour I wanted! Get hands on with a craft at a workshop or with a kit before getting too far. Here at Craft Box Club I run 1 on 1 sessions with subscribers to help you when you’re starting out.
Invest in good kit - Once you’ve worked out what you need, buy good stuff that will last. For me, I just love the feel of wooden tools over plastic. They also last longer and are easier to repair at home.
Look after your kit - Keep a tidy craft space so you know where everything is. Treat things well and it will serve you well for many years to come!
Choose whole crafts - Especially if you’re a crafting pro, buy materials you need in bulk to save you money and reduce pollution from packaging and transportation.
Make crafting a way of life - Turn your hobby into a useful skill. Make things that you can use around the house. Turn your crafts into special gifts to bring joy, save money and reduce pre-packaged consumerism. Make or upcycle clothes or furniture and help extend the life of second hand stuff.
Turn your waste into art - I once went to an exhibition of art made from tumble dryer fluff! That’s pretty extreme but projects like rag rugs or wreaths (see below) are brilliant for using up left over fabric! Old candles can be melted to make new. Wooden palettes make amazing garden furniture!
Get inspired by nature - I’ve been taking early morning walks recently. The patterns made by the frost are just beautiful! Every seasons has something different to offer, take a camera, capture some of nature’s beautiful and connect with your environment.
Craft with nature - While you’re out in nature, collect a few twigs, leaves, stones etc. and make something out of them. It doesn’t need to be anything incredible or even permanent but it gets your creative muscles flexing and strengthens your bond with nature and the changing of the seasons.
Craft with us! - Craft Box Club is dedicated to eco friendly crafting. All kits are plastic free and full of great natural materials. You won’t have any waste apart from bits left over just in case and you’ll have the perfect kits suited to the project.
For more help developing more sustainable habit, visit the fantastic Ailuna!
Want to get crafting?
If you’d like to get creative now, join Craft Box Club today and we’ll get your first craft to you asap. Your purchase will also help to planet urban trees!


New kit: Heart Felt Garland
Bold, bright and beautiful way to bring love into your crafting!

The new needle felting kit - the Heart Felt Garland!
14th February 2021
It’s Valentine’s day and I’m feeling pretty loved up! I really wanted to bring that into the new kit this month! I’ve also loved all of the rainbow art that I’ve seen everywhere over the past few months. Rainbows have been adopted as the symbol for so many causes but at their heart, they stand for hope. Right now, I’m hoping for an end to lockdown and a return to a more normal way of life. But more than that, I’m hoping we can carry on all the positive things from this past year; more remote working, seeing more of our kids and getting more in touch with nature!
Needle felting
If you’ve not tried needle felting, you should! I’ve such a beautiful, accessible craft. You really don’t need special skills so you can jump right in a get creative, making 2D art or 3D sculptures. You start with handfuls of fluffy wool which you stab repeatedly with a special felting needle. This action meshes the wool fibres together and creates felt in any shape you like!
My introduction to this craft was creating a dog sculpture, it was super fun but I find that, when you’re new to needle felting, animals can come out looking a little off. I always make sure that Craft Box Club craft kits are really easy for beginners and that anyone can get a great result. That’s why I love the heart shapes in this garland. They are so familiar and easy to sculpt. They also feel so nice and squishy in your hand!
Top Tips for beginners
Start simple - Just get used to the action to begin with, craft a simple shape in one colour
Believe! - This is one of many crafts which a little patience really pays off. It’s hard to believe that stabbing some wool with a needle will do anything at all, but stick at it will all happen in front of your eyes!
Be careful! - Felting needles are really sharp and it’s easy to get distracted while your felting. Make sure you keep your fingers out of the way.
Get the right kit - There are a range of grades of felting needle out there. Some will felt fast but will be hard to get the detail, others will take ages to get a result. Do your research before you buy, or, hey let us do that for you and grab this kit.
Get creative - Experiment with loads of different shapes and colour combinations.
Craft plastic free - It’s really not been a challenge to make this kit plastic free. If you want to take this craft further, buy awesome quality wool and ask for plastic free packaging. I buy from World of Wool who will pack plastic free on request and have great natural products in beautiful colours.

The heart garland!
These materials are awesome!
As usual, this kit is plastic free, that’s the packaging, the materials and the tools! It’s such a cool kit to open, the first thing that will catch your eye is a brightly coloured rainbow of wool! You’ve got just the right kind of felting needle and some brilliant heart templates to make your shaping super simple!
Another great thing about this kit is that you get some stuff that you can reuse for other creative fun! The heart templates can be used as cookie cutters and the sponge (made of wood fibres) which you use as a base for felting, can or course be reused as a kitchen sponge or for various other more artistic purposes.

The needle felting craft box!
Go Get creative
I just know this kit is going to be a hit!
Not signed up yet? Just click the button below to explore beautiful eco friendly crafting. Start your creative journey here!

We help plant trees!
More trees better planet

Supporting trees for Reading
24th January 2021
As well as bringing you beautiful natural craft kits I really want Craft Box Club to be a force for good in the world and have a positive impact on the environment. Until now I’ve focussed on cutting out all plastic from our kits and massively reducing the plastic in our supply chain. However, I want to go further. Like most businesses, Craft Box Club takes from the Earth in terms of resources to make the kits and will contribute a small amount of pollution from sourcing and delivery kits to you. It’s time to start giving back.
what we’re doing
The first big announcement is that, from February 1st 2021, we will be supporting Trees for Reading by sending them £1 for every new subscriber. Trees for Reading is a brilliant project from Ethical Reading. Their aim is to plant more trees in Reading. It’s a fairly new project but they’re already delivering by planting new trees in the urban environment in and around Reading.
Why plant urban trees?
I’ve been looking at carbon offsetting for Craft Box Club. These schemes usually involve planting new trees for a monthly fee. The main purpose of this is to use trees as carbon dioxide absorbing machines to help in the fight against climate change. However, I’ve chosen not to go down that route but instead support this local scheme.
Although the trees planted by Trees for Reading will, of course, absorb CO2 and help to tackle climate change, this is not their main aim. Urban trees, in particular, have additional benefits. They can reduce local temperatures by creating shade, filter pollution, regulate water flow and improve water quality, provide much needed habitats for wildlife and, I think we can all agree, just make the world a nicer place to be! In fact, you can see a measurable positive impact on mental health just from people having more trees in their lives!
How can I help?
If you’d like to find out more about Trees for Reading and find out more about the amazing benefits of urban trees you can do using this link.
If you’d like to get creative and plant trees you can join Craft Box Club today and we’ll send £1 to Trees for Reading.
Thanks so much for your support!

New kit: Lino Cut Letters
An eco friendly twist on an awesome traditional craft

The new Lino printing letters kit
22nd January 2021
I know I always say that every craft is my favourite, but this one takes me right back to school! I’d never really felt comfortable in art class. I’d never thought of myself as being creative. I thought, “even my handwriting is terrible, how can I be good at art!?”. But then we had a class on lino cutting and printing. I absolutely loved it! Cutting the lino is a brilliant process, it’s also super forgiving and great for beginners as you can sketch out your design on the lino and then shape it as you cut.
The eco friendly twist
Lino printing isn’t new, it’s been used to make art since the turn of the 20th century. Linoleum itself, although it looks like plastic, actually isn’t! It’s made from things like sawdust and cork all held together with pine resin and burlap. There are modern, plastic versions out there, but we’ve gone traditional and biodegradable.
Printing ink can be made from all sorts of things but it usually contains acrylic which isn’t the best for the environment by itself and needs a plastic container. We’ve made the swap to natural earth paint that you can mix yourself. Totally not toxic and it can be packaged in paper!
The sponge that you’ll use to apply the paint to your stamp is made of wood fibres! To be honest, before researching this kit, I didn’t even know they were a thing. A super easy eco kitchen swap! You can pick them up from my friends at Peace with the Wild.
Finally, you also get lots of brown recycled paper cards to print on! The black mono print looks super cool on the brown card!

The box!
The design
You can go really complex and detailed with lino cutting, but at Craft Box Club, we prefer to start simple! This design is based around a letter and tree silhouette template. Both letters and leaves are super easy to cut and they produce an awesome effect as well. If you’re going for your own design, try to keep it simple to start with before experimenting with all the amazing effects you can get from a lino cut!
Oh and it’s A because I’m Adam but the kit contains templates for the whole alphabet!

Go Get creative
I really hope you enjoy this kit!
Not signed up yet? Just click the button below to explore beautiful eco friendly crafting. Start your creative journey here!

We're here to help!
Here to help get your crafting!

Here to get you crafting
2/1/2021
We’ve been wracking out brains over a little Christmas holiday to think of ways that we can support you in your crafting. We’ve had loads of people joining over Christmas and we’re already starting to see people who want to take up crafting as a new hobby or a new year’s resolution. It’s really exciting and we’re super keen that you have an awesome experience!
So here’s the first thing that we’re offering to all our active subscribers…
oFFICE HOURS/Drop in sessions/crafting sos!
You can now book 30 minute sessions, over the phone or via video conference so you can have personal help if you’re getting stuck. Just find a time that suits you, it’s that easy! Don’t be afraid! We’ll find out where you’ve gone wrong and, if possible, craft along with you to get you right back on track!
Easily find a craft guide
You have a link to the online craft guide in each kit plus a QR code that takes you right to the page you need. We know that sometimes that’s a bit fiddly, so we’ve created a library of all of our craft guides. Find your kit and click the link.
All this can be found on our new Members Hub…
This service is only available to active subscribers, not signed up yet? Hit the button below and join our super community of eco crafters!
HAPPY CRAFTING!

New kit: Pom pom and Tassel Christmas Rings
Introducing this year’s Christmas Craft Kit!

Introducing the Christmas Craft Kit
21th November 2020
Here it is, in all it’s glory, our Christmas Craft Box! I’ve been planning this for ages and I’m really please with how it’s turned out. I think you’ll really love learning how to make pom poms and tassels. I really wanted this Christmas box to be something that you could make and show off at Christmas but that didn’t look out of place hanging up in your home all year round. These magic rings look great on a Christmas tree or hung up as a wall hanging. The video for this kit is super fun. I’ve loved finding Christmas music to a little bit of extra Christmas sparkle to give you a Christmas crafting boost. I’m so excited that people getting this kit as a Christmas present might get all the family round YouTube to watch the video on Christmas day. Let’s hope we can get together with our loved ones safely this year!
Making Pom poms
I hope you love making pom poms as much as I have! They’re so versatile, they can be used to make so many things! The wreath below is made from all my left over yarn from this year. I really love it! Huffle the penguin is made of poms too! Amazing huh? Who else loves the googly eyes?
The kit shows you how to make poms the traditional way but if you want to make enough pom poms to make a wreath like this then I’d recommend getting yourself a pom pom maker. I’ve tested loads recently. There are wooden pom makers available but I’m sad to say that I don’t think they’re as good as the plastic ones. I don’t mind recomending these plastic pom makers though as they’re well made and you’ll get so much enjoyment from them! Here is a link to a pom making craft kit from my friends which includes the good makers.

Pom pom wreath
Tassels
You can use tassels to add a bit of glitz to loads of craft projects. I couldn’t believe they were so easy to make! All you need is your hand and a pair of scissors! A great one for Christmas crafting with the family this year!
Pom and Tassel history
Did you know there are references to tassels in the bible!? In the Hebrew Bible, the Lord spoke to Moses instructing him to tell the Israelites to make tassels on the corners of their garments, to help them to remember all the commandments of the Lord and to keep them and as a sign of holiness. They have been widely adopted as a symbol of status to adorn clothing and furnishings over the years.
Pom poms have their routes as a military decoration for topping hats. The colour, shape or size of the poms helped soldiers to differentiate between regiments. Meanwhile, off the battlefield, the pom-pom held great significance as well. In South America, traditional garments of both men and women were being decorated with differently colored pom-poms as a signal of their marital status. In Rome, clergymen wore square-peaked caps called birettas. The color of the pom-pom that crowned each biretta signified the wearer's order.
Let’s not forget their use as part of traditional dress in Scotland. Men wore a floppy beret called a Balmoral bonnet that was topped with a bright red pom-pom iconically known as a Tam o’ Shanter. Check out some lovely examples on Esty.
Go Get creative
I really hope you enjoy this kit!
Not signed up yet? Just click the button below to explore beautiful eco friendly crafting. Start your creative journey here!
MERRY CHRISTMAS

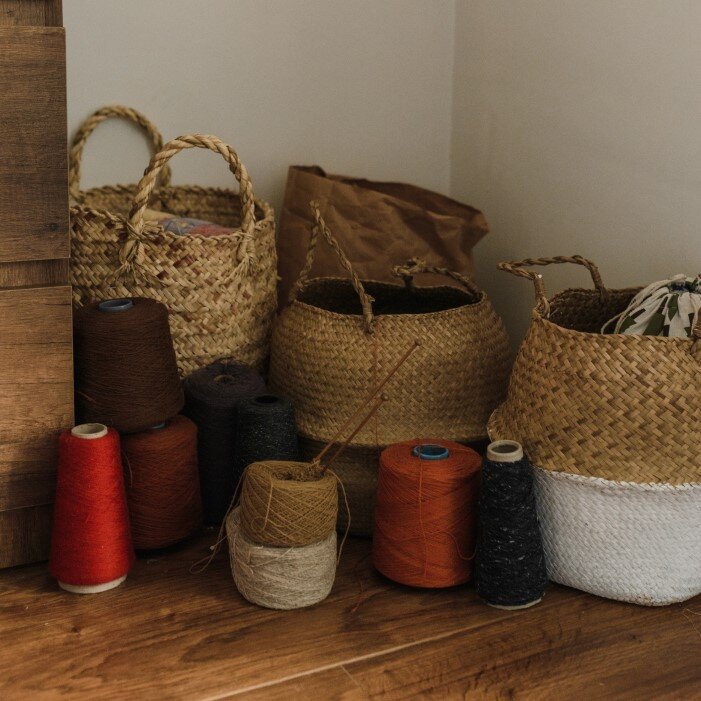
New kit: Wool and Rope Basket Weaving
So much fun and an amazingly useful skill to learn!

The wool and rope basket weaving kit
13th November 2020
This has been on my crafting wish list for ages! Yes it’s a long list. I’ve been inspired by the rope and wool rainbows that have been everywhere this year but I wanted to see whether I could use a similar technique to create a basket. I think it’s worked really well. The traditional stitches provide the strength to the basket and the wool provides the colour and a lovely fluffy feel.
It’s all about the rope
After doing loads of research on rope baskets and having a couple of failed attempts, I’ve discovered that the type of rope you use is super important. Lots of rope is made from plastic which is horrible to work with and especially tough to get a needle through it. This craft kit uses cotton rope, making everything much easier!

The finished basket
craft history
It’s widely thought that basket weaving is one of the oldest known crafts. Just imagine how useful it would have been to turn materials like sticks and grass into baskets to help carry things long distances! The process of interweaving twigs, seeds, or leaves for baskets and mat making is one of the most universal crafts, ranking among the most ancient industries.
As these baskets would have been made from natural materials very few of them survive. However, the weaving techniques have been passed down through the generations and they survive to this day!
The oldest known baskets were unearthed in Faiyum in upper Egypt; radiocarbon dating has shown them to be between 10,000 and 12,000 years old. Other Middle Eastern sites have produced baskets up to 7,000 years old. The earliest dates for baskets are older than any yet established for pottery.
New craft kit testing team
I’ve started to test all the new crafts out with my girlfriend Emma. We had the best afternoon making this kit together and checking that it would be easy and fun for all the awesome CBC subscribers to do. We’re going to do this now with every kit as our little crafty partnership starts to develop.
Thanks Emma!

Beautiful merino wool
Go Get creative
I really hope you enjoy this kit!
Not signed up yet? Just click the button below to explore beautiful eco friendly crafting. Start your creative journey here!

New kit: Circular loom weaving
Super soft crafting!

Introdction to Circular Loom Weaving
12th October 2020
Another month flies by and once again I’ve found the very best crafts for you using no plastic and lovely natural materials! I feel like I’ve really struck gold with this one! Here’s the story behind the kit…
Find inspiration everywhere!
You know those days when you don’t really have much planned but you just take yourself on a mini adventure? Don’t you find that they’re always the best ones? The one’s you remember and the days that give you the biggest boost.
Last month, my girlfriend Emma and I met up for a countryside walk. We pretty much just picked the spot that was between us on the map and that had free parking. We ended up on Overton in Hampshire. Actually really lovely! Super coffee and a nice walk!
We drove around for a bit after the walk to find a picnic spot and by complete chance, and slight hungry desperation on my part, stopped at Whitchurch Silk Mill. Aside from being absolutely stunning outside, I loved having a look around the looms and other machinery, which would have originally all been powered by water wheel.

Inside the mill
I left feeling really inspired to have a go at some basic loom weaving and I’m so pleased to be bringing this craft to you!
History of loom weaving
Humans have been weaving since the Palaeolithic era. Flax weavings are found in Fayum, Egypt, dating from around 5000 BC so we’ve been weaving for a very long time to produce fabric for all kinds of uses. The process has undergone several stages of improvement and industrialisation over history including during the Industrial revolution when weaving switched from hand to machine. John Kay invented the flying shuttle in 1733 and enabled weaving of wider fabric as well as made it faster. The first factories for weaving were built in 1785. The Jacquard loom was invented in about 1803. It could be programmed with punch cards which enabled faster weaving of more complicated patterns.
merino wool
I want to take you back to hand weaving and help you get to grips with these wonderful materials shown below. This kit includes merino wool from Yorkshire which is one of the most sustainable materials. The wool comes from Merino sheep which is prized for it’s soft feel and it’s strength among many other qualities. If you’d like to find out more about it then I can seriously recommend watching this film!
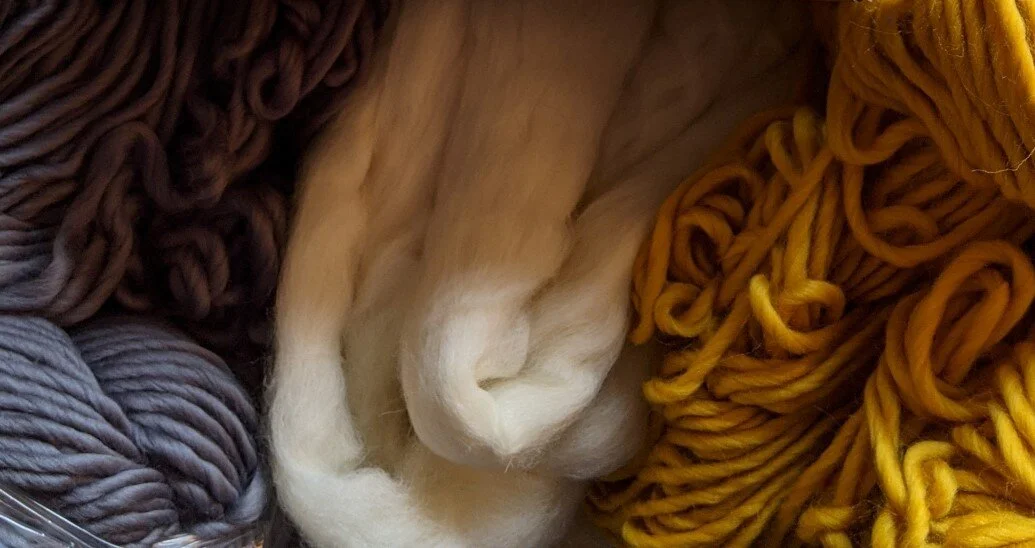
Beautiful merino wool
Go Get creative
I really hope you enjoy this kit!
Not signed up yet? Just click the button below to explore beautiful eco friendly crafting. Start your creative journey here!

How to tie dye using natural avocado dye
Make your own clothes using avocado stones!

How to tie dye with avocados!
20th September 2020
This month I’ve been learning the art of natural avocado dying to make the next latest craft kit for all my wonderful eco crafting subscribers!
I love tie dye and it’s having a massive resurgence in popularity this year. I’ve been researching commercial dyes for a while and can’t find any that I’m happy with. They’re mostly really highly toxic, dreadful for the fish and come in single use plastic. I’ve also seen lots of tie dye done with loads of squeezy plastic bottles. Nope that’s not for me. This kit is something totally different.
By far the best person to speak to if you’re interested in natural dying is Rebecca Desnos. The kit and the video guide that goes with it is a distillation of Rebecca’s method. I’ve taken the essential parts you need to make a quick start with this craft. Let’s be honest, you really need to see this in action before you can even believe that it’s possible to get a pink dye from an avocado right?
How does it work?
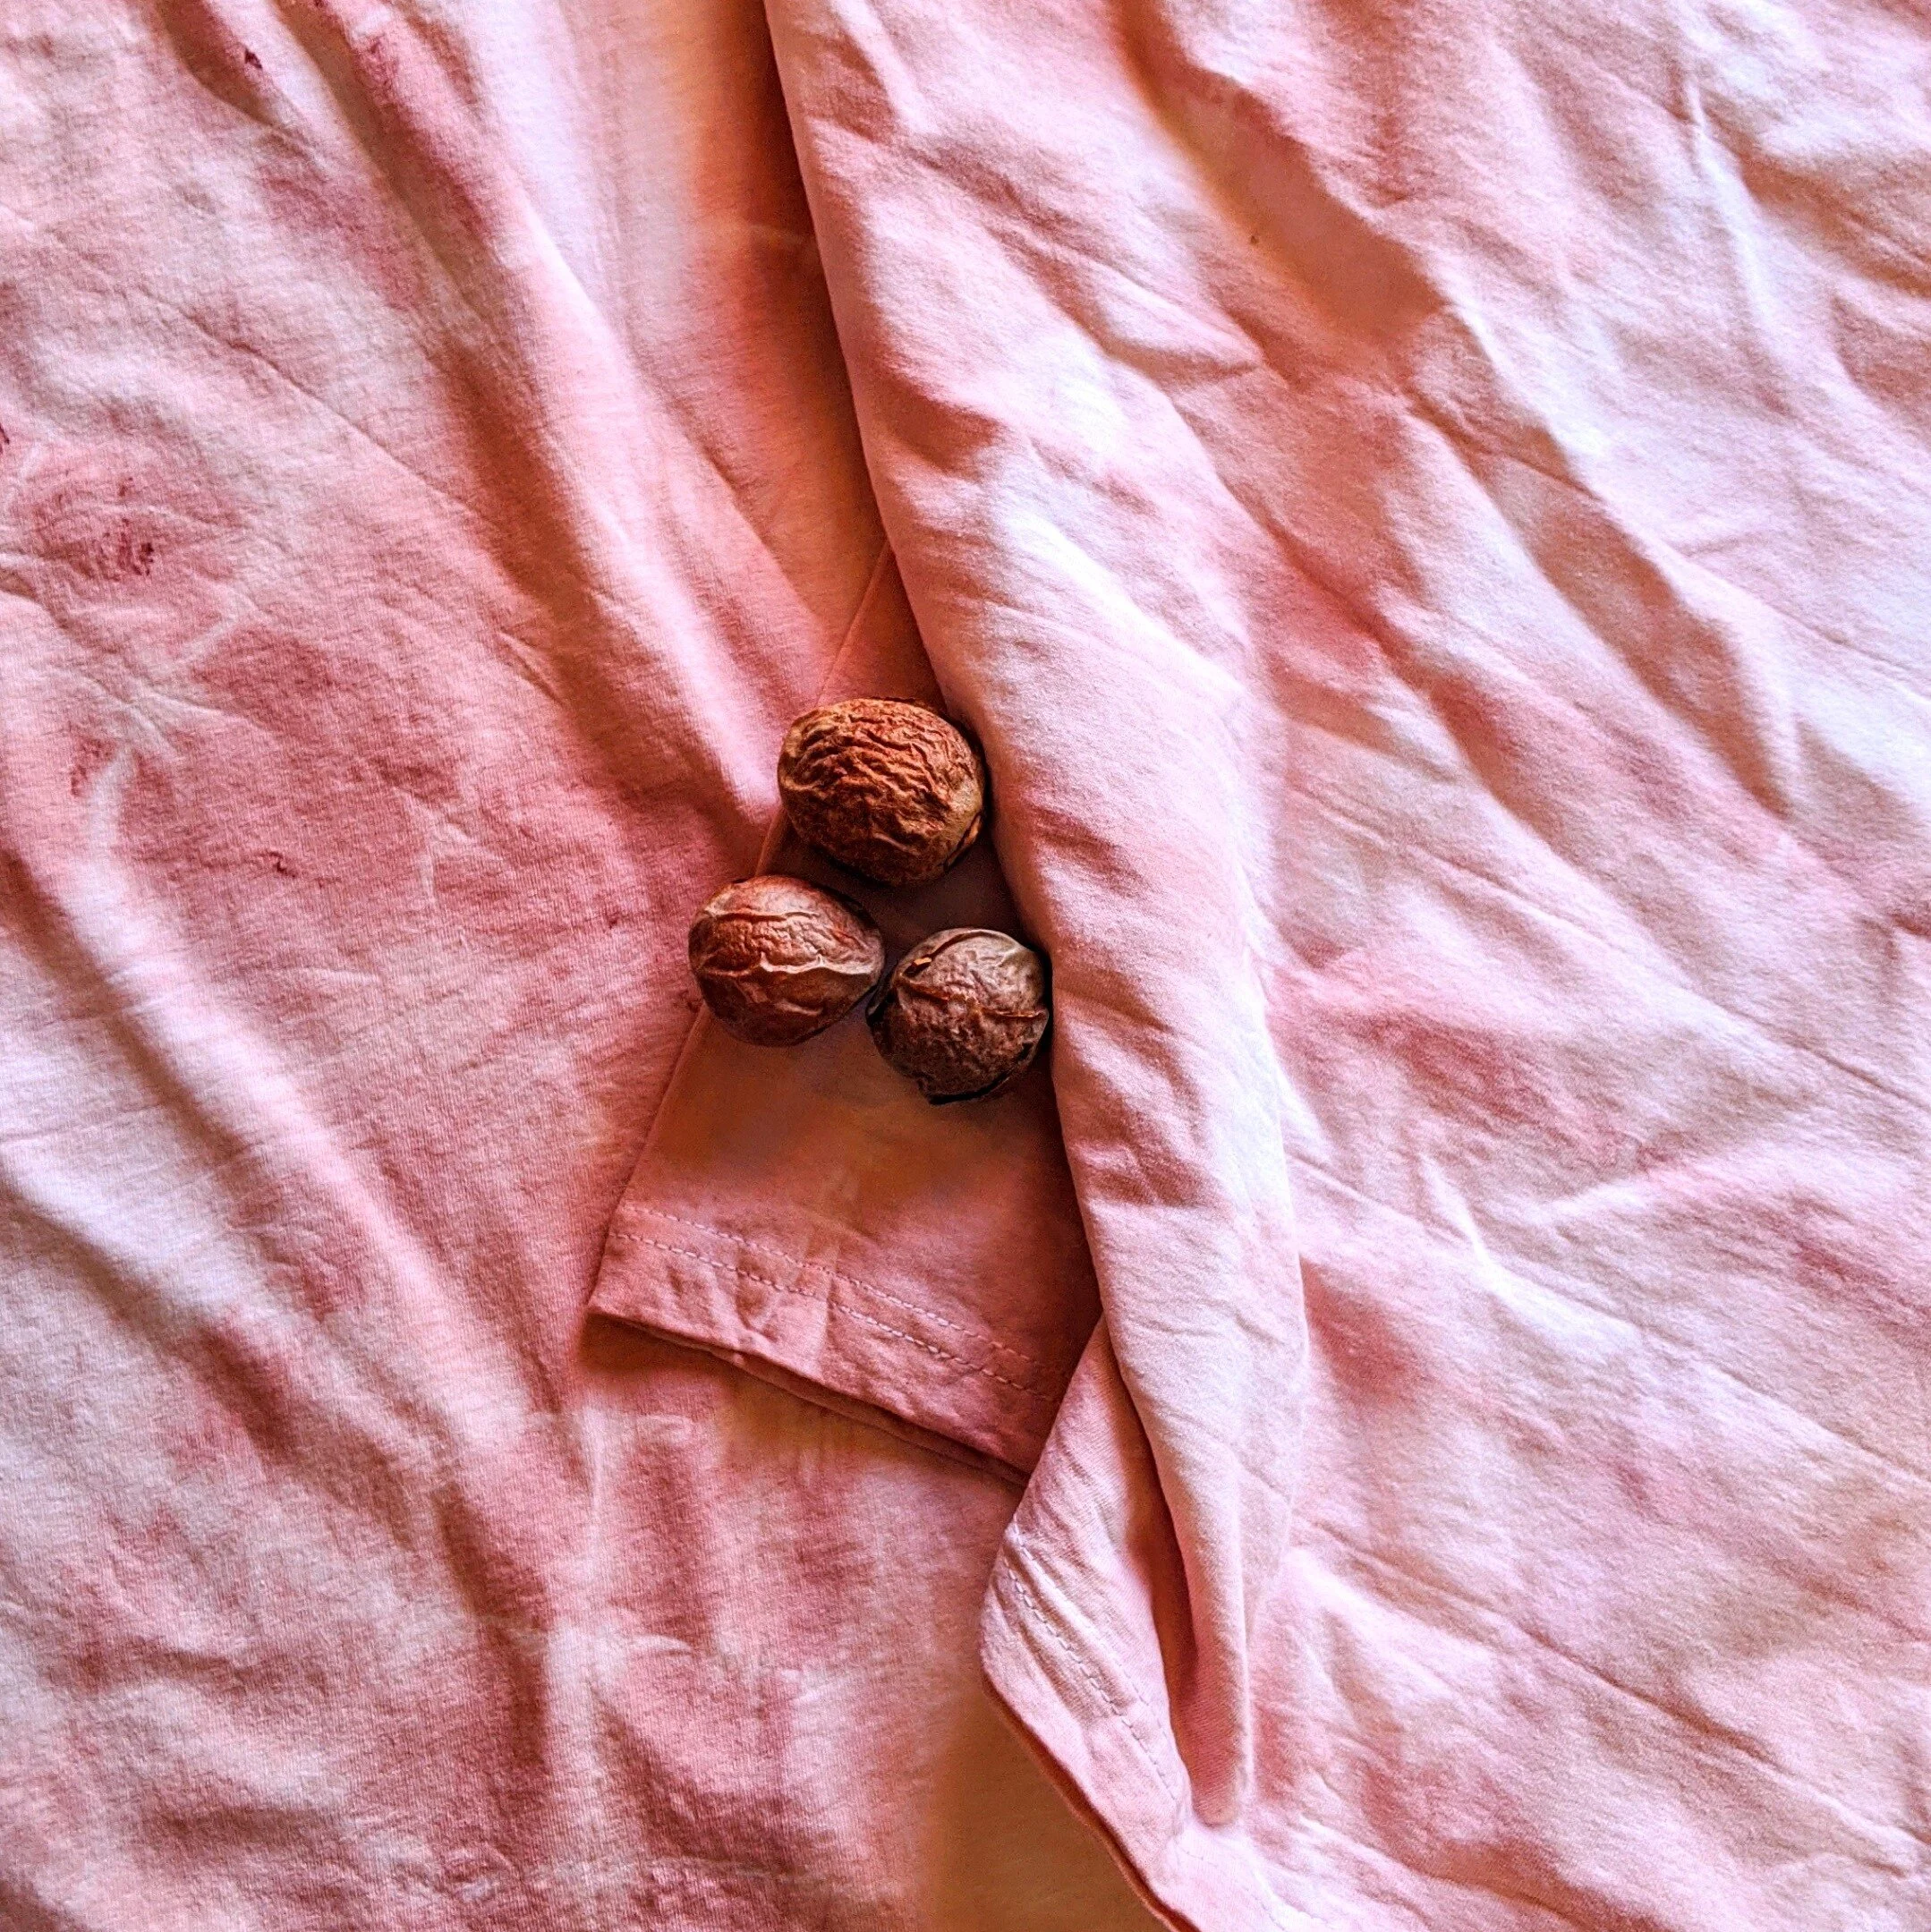
Avocados are particularly good to use for dying! Not only do they contain this beautiful pink colour (some people call it millennial pink but I prefer strawberry ice cream pink) but they also contain tannins which help the dye stick to your fabric, even after washing!
How to make avocado dye
This is the easiest way to make lovely deep pink fabric dye from avocados. For more information, check out the video guide or subscribe and ask for this as your first kit!
Save up your avocados! - I’ve found, for best results, you need about 4 avocados for a couple of t-shirts.
Keep the stones - the easiest thing to use for making dye is the stones as they store really well and the make the deepest pink dye. You can pop them in the freezer or dry them. If drying, store them in something breathable like cardboard so they don’t go mouldy!
Give yourself a little time - the process of making natural dye takes a little while so make yourself a tea and have a home day.
Gently simmer your stones - simmer your stones very gently for an hour.
Get squeezing - after an hour, your stones should soften up. Get a potato masher and give them a good squeeze to get all the dye out of the stones.
Strain your dye! - in our craft kits, the stones come in little muslin bags but if you’re doing it on your own, make sure you strain your dye through a tea towel or a fine sieve. If you get little bits of skin in your dye, you’ll get brown specks on your fabric and it just looks messy!
Leave the dye overnight - it will oxidise and intensify the colour.
Tie your pattern - there’s loads of info about on tie dye patterns so I won’t go into that here. But! You’re leaving your fabric in the dye for longer with natural dyes, so tie tighter than usual for a sharper pattern.
Pre soak your fabric - soak your fabric in warm water before you dye. It relaxes the fibres making them ready to accept the colour.
Get dying - warm your dye up to just below a simmer and cover your fabric in the dye. Leave it on a VERY low heat for an hour then leave to cool.
Bag it up - place your wet fabric in a biodegradable “plastic” bag. The longer you leave it the better but I find overnight is just fine.
Dry naturally - remove the fabric from the bag and dry naturally. Make sure it’s not dripping onto anything as it will stain and make sure it’s not in direct sunlight as that will make the colour slightly fade.
Don’t throw it away! - now I don’t quite get why, but if you keep your dye and use it again, it just gets better! Give it a go and let me know how you get on.

Want to get crafting fast?
Join loads of happy crafters and get crafting today. Join Craft Box Club for £20 a month or less.

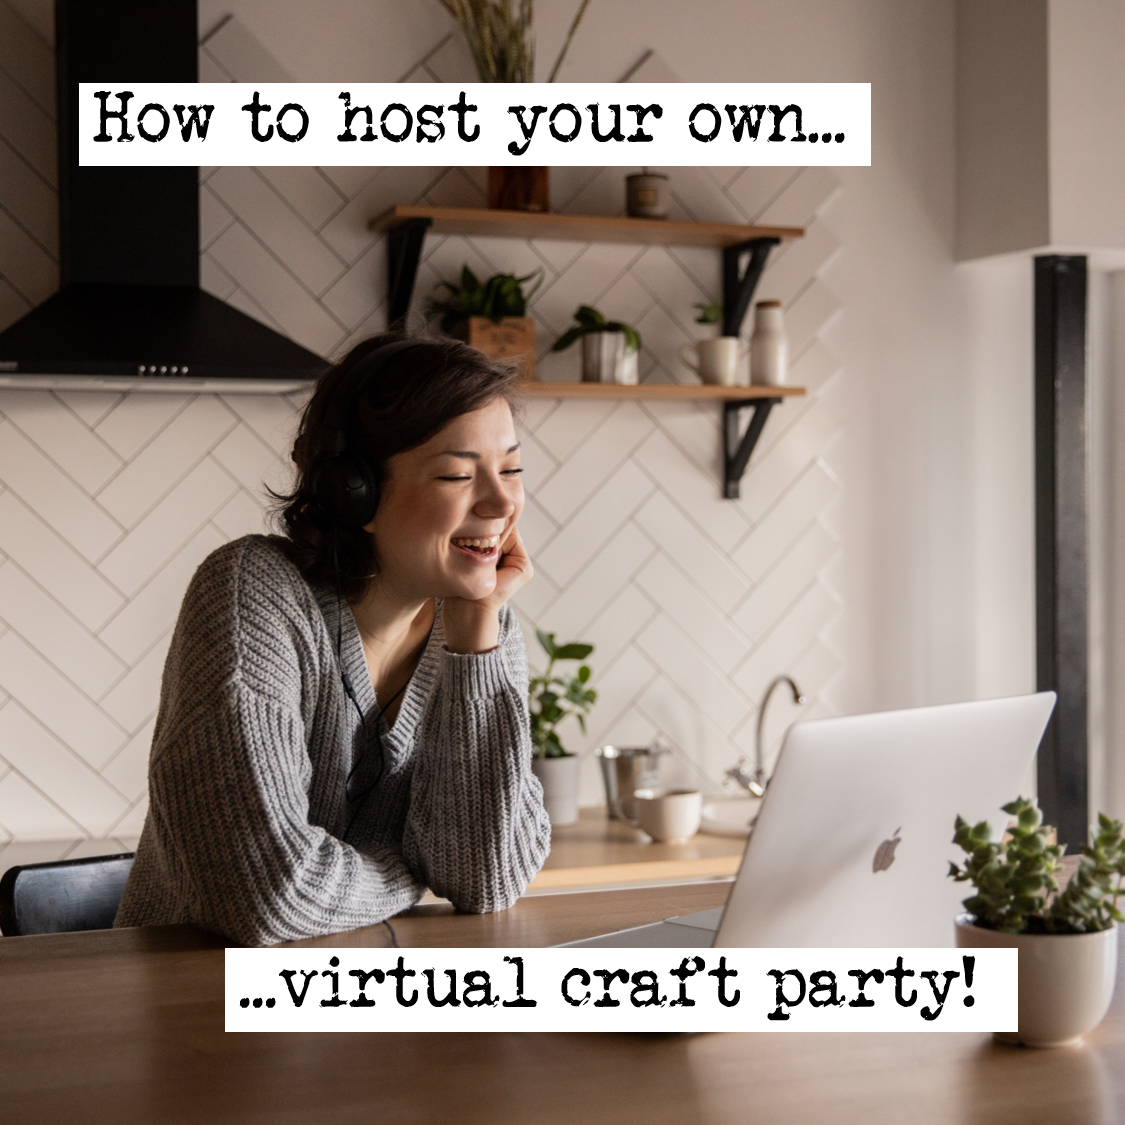
How to host your own virtual craft party!
Want to know how easy it is to host your own craft party?

TOP TIPS FOR HOSTING YOUR OWN VIRTUAL CRAFT PARTY!
15th September 2020
Since lockdown at the start of the year I’ve hosted several amazing live crafternoons! I’ve totally loved it. It’s been incredible to meet a bunch of lovely, interesting people who have had loads of fun and made something they’re proud of. I loved the idea so much that I wanted to help you host your very own to spread the crafty love.
Why host a virtual craft party?
It’s super fun - making something that is your own with you hands is really rewarding.
Even more fun with friends - sharing the experience of making is the best thing. It’s a great conversation starter and amazing way to bond with your friends, family or colleagues.
Great for connection and mental health - right now, it’s pretty tough meeting up with a group of friends. You never know when the COVID rules will change to ruin your party plans. Host an online party with a difference, get back those awesome chats and rebuild those connections! It’s a great mental health boost that we all need.
You can all learn together - when you’re learning something new, it’s awesome to have your friends around for support and, let’s be honest, to show off to.
It’s easy! - Craft Box Club makes it so easy. Just follow the steps below and you’ll be crafting in no time!
How to order?
It couldn’t be easier! Click on ORDER HERE below. All we need is the the names and addresses of your party and your choice of craft kit to get going. The bigger the party, the cheaper each kit so bring a crowd!
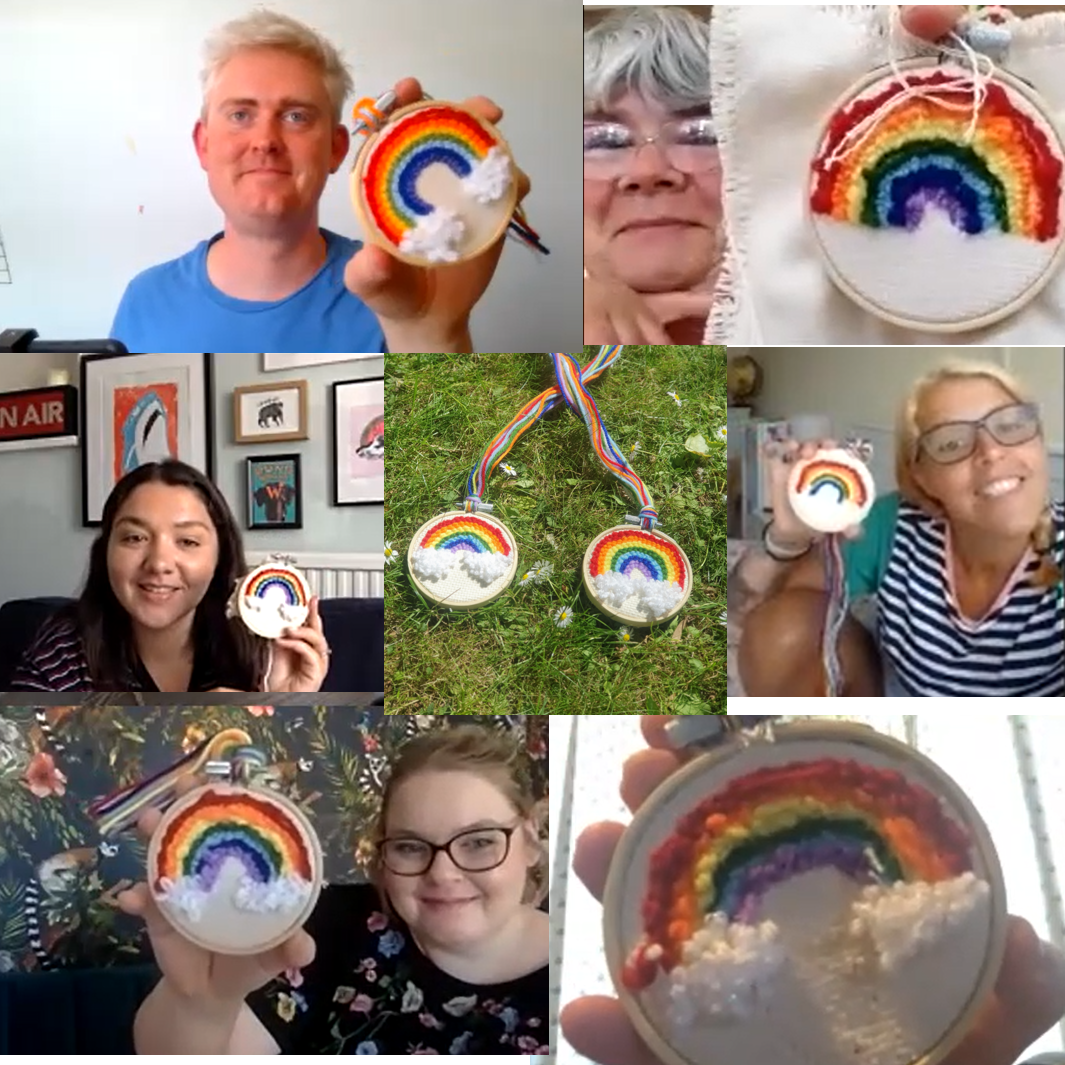
We had loads of fun during lock down making rainbows!
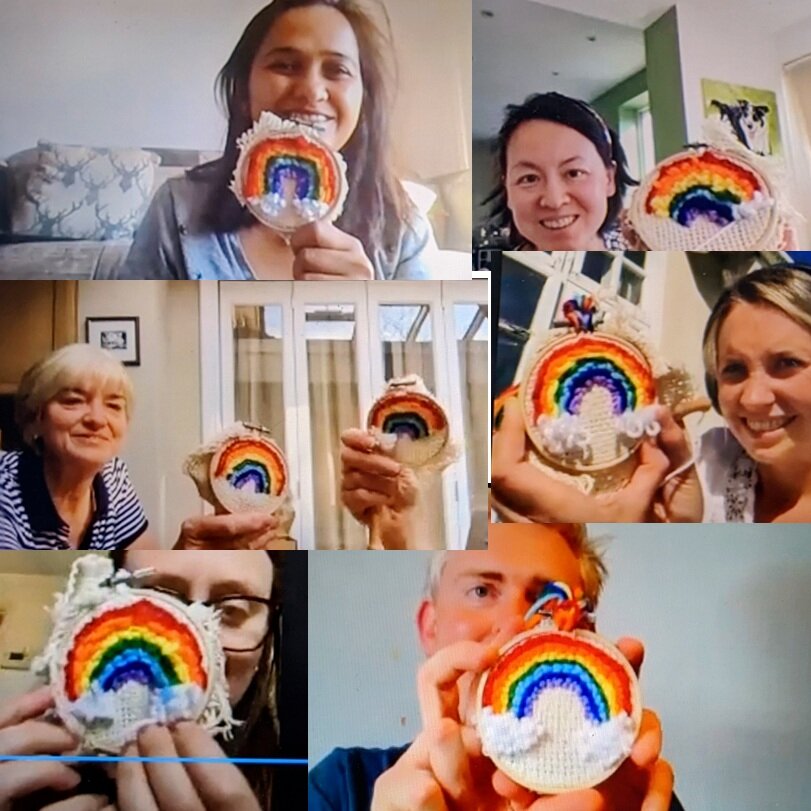
So much fun, we did it quite a few times!
HOW TO CHOOSE YOUR CRAFT
Check out all of the current kits - using the button below. Most are still available for craft parties.
Choose wisely - we have a wide variety of kits available. Some take more time than others and a few need you to wait overnight for things to dry or develop. There are details in each other the guides. Choose the one that fits with your event. For questions and recommendations email adam@craftboxclub.co.uk.
which video chat?
Chose your platform - There are so many platforms to choose from and they all have different pros and cons. Don’t worry about all the fancy ones, go for a tried and tested popular one that all of your party will have. The two that work best for me are Facebook Messenger and Skype. On Facebook you can set up an event especially for a group chat which makes scheduling super easy!
Go hands free - While I’m on the subject of video chats. If you’re going to use your phone, make sure you have something so you can call hands free. You’re not going to get far crafting with one hand! If you don’t have a snazzy gizmo don’t worry! Just have something to prop your phone up against.
The main thing is to make sure that everyone knows when and how to log on and you’ll be fine!
on the day
Clear some space - Clear a space for crafting and get cosy.
Get your kit ready - Make sure you have all the kit you need. Craft Box Club kits come with all the essentials but sometimes you also need scissors, water etc. so read the tip sheet in the box to check.
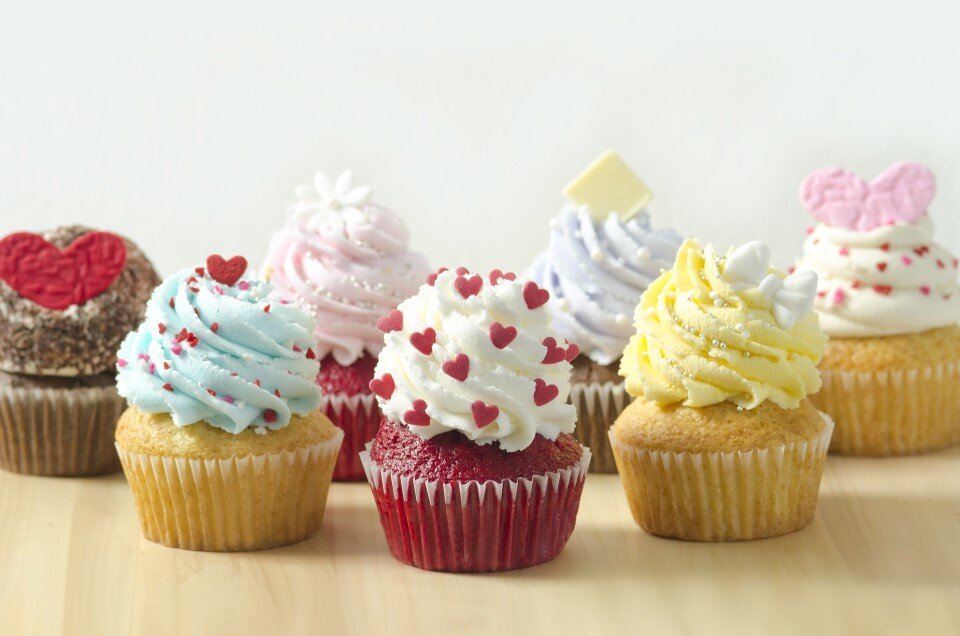
Refreshments - If it’s a crafternoon get the coffee and biscuits ready. If it’s a boozy bubbles and craft night then make sure your glass is ready to go! If you need nibbles in the post for your craft party, we know who to recommend!
Relax! - Yes, it’s all about the craft but don’t forget to party. Don’t put pressure on yourself to get everything perfect. Just dive in and have fun and great chats!
Video guides - Don’t forget, all Craft Box Club kits are video guided. Decide whether you’re going to watch these as a group or in advance
Yes let’s do it!
Great! You won’t regret it. Get your craft on and order below! If you have any questions email adam@craftboxclub.co.uk.


New kit! Paper Quilled Jewellery Set
Behind the scenes of making this kit…

Behind the scenes!
9th September 2020
Aaand it's ready! The lastest craft from Craft Box Club! I know I always say it, but I’m really proud of this one. The kits just keep getting better and better. In this one you get everything you need to make two earrings and a pendant from beautiful, little coloured coils of paper. Magic! There’s also loads of extra paper in the kit too so you can go ahead and change the colours. You can also experiment with loads of other designs too!
I’m so pleased that this kit is out in the world. Although it was inspired by summer flowers, the heat in the studio was super intense! I do not recommend quilling when it’s over 30c! Sweaty hands and paper = mess! It’s been a mega busy time over the summer and I’ve not been able to blog and chat to everyone as much as I’d like but I’m back on it now and ready for the next kit!
To make this kit extra special and keep the plastic in the supply chain down to an absolute minimum I’ve partnered with two other businesses who share my values. Check out the guide for more information and links. I’ve loved working with other crafters to make custom pieces for this set. It’s totally worth it for the planet and I love the feel of wooden tools rather than plastic.
Jewellery making
I really love making jewellery. There’s more to think about than if you’re just making some art for the wall. It’s got to work as well as look good. It’s been really fun working on the flower and teardrop design for this kit. I’ve not seen anything else quite like it so they really stand out. The techniques used aren’t to complicated either and are definitely suitable for beginners. Towards the end of this make there’s a little bit of wire wrapping. I really enjoy working the metal as you have to be gentle but firm to get the effect you want. The flat coiled wire attachment came after about an hour of trying other designs that were either way too tricky or just didn’t work properly. I’m really pleased with them. Let me know what you think!
Top tips for making paper quilled jewellery
Take your time and be methodical – there are a few stages to making this design. Work methodically making all the individual pieces you need before you complete the final design.
Don’t use too much glue – quilling paper is really thin. Using too much glue makes it all wet and ruins the neatness of the design.
Use the quilling template – particularly if you’re making flower designs it’s good to get everything to look uniform.
Embrace bright colours – I love all the colours in this kit. It was hard to narrow them down. These are bold statement pieces so go bright or go home!
Happy crafting!
JOIN THE MAKER MOVEMENT
If you’d like to learn the skills to start making your own beautiful and useful things, join us today! It won’t cost the Earth!

Our Plastic Free Journey - #4 Unless...
Making your own as environmental activism

Our Plastic Free Journey - Unless…
18th July 2020
I’m on a plastic free journey. But it’s more than that. It’s more than just about keeping our craft kits full of awesome quality tools and natural materials that won’t cost the Earth. This is my way of being the change I want to see in the world. A change that I’m carrying through my whole life as well as my business.
A CAUTIONARY TALE
Every Sunday over lockdown I’ve been setting aside time to sit with my brilliant four year old daughter Harriet to watch a film. Over the last few weeks I’ve been drawn strongly towards films with an environmental message. You don’t have to look too far! My personal faves are FernGully, WALL-E and The Lorax.
It was hard to watch The Lorax last week without feeling a personal connection to it. It’s the story of a boy who follows his dreams to make his own product, a Thneed, to sell and build a business he’s proud of. He’s just using the leaves from a single tree and selling locally. He’s his own independent business.
Very quickly though, as his product gets more popular he has to bring in other people to help him, he needs to make things faster, more efficient and needs to support this by making more money fast. Before he knows it, he’s cut down every last tree and destroyed the planet and, without anything left to make his Thneed, he’s left with nothing. There’s so much pollution now that fresh air has to be sold in plastic bottles.
Although I’m really pleased that Craft Box Club is starting to attract many happy customers, it’s still way off having the overnight success of the Thneed. But this cautionary tale got me thinking about what I’m building. As Craft Box Club grows, as any business grows, I can see how easy it is to go down the route seen in the Lorax. So I thought I’d better commit to a few things up front so that you know that, if you buy from Craft Box Club, you’re supporting something good for you and the planet.
I promise I will…
Remain independent – Without the pressure to act in the interest of external financial demands I can stay true to what I believe in.
Keep making my craft kits plastic free and as sustainable and low impact as I possibly can. More on this in future blogs.
Continue to promote environmental issues.
Be true to the Craft Box Club values in the whole of my life. Links to some people that help me with this at the bottom.
Make sure that Craft Box Club growth and scale makes it more sustainable not less.
The maker movement
I believe that making your own is a kind of environmental activism. That’s why I’ve made it my business to encourage you to learn how easy it is to make your own household items (food wraps, coasters, candles), jewellery and clothes (avocado tie dye Ts) from simple, natural materials. As well as crafting being awesome for mental health and self expression, it’s also great for the planet. You’re way more likely to look after your stuff when you develop an emotional connection with it because you made it. If you can make from raw materials you can better understand supply chains and take control of them. For those of you who love making a home cooked meal from beautiful fresh ingredients, why stop at food? Why not apply that thinking to everything you consume?
Why care about all this stuff? Well unless we embrace sustainable materialism and react against our world filled with throw away consumer goods and single use plastic, I’m worried about the kind of planet we’ll end up with. And this is the only one we’ve got. As The Lorax says…
“Unless someone like you cares a whole awful lot, nothing is going to get better.
It's not.”
JOIN THE MAKER MOVEMENT
If you’d like to learn the skills to start making your own beautiful and useful things, join us today! It won’t cost the Earth!
Top eco businesses
Riverford - food boxes
Peace with the Wild - Plastic free household alternatives
Sustainable way - Beautiful soap, plastic free
Loop - order essentials in reusable, returnable packaging

New kit! - Sand Cast Candles
Introducing our latest amazing craft kit!
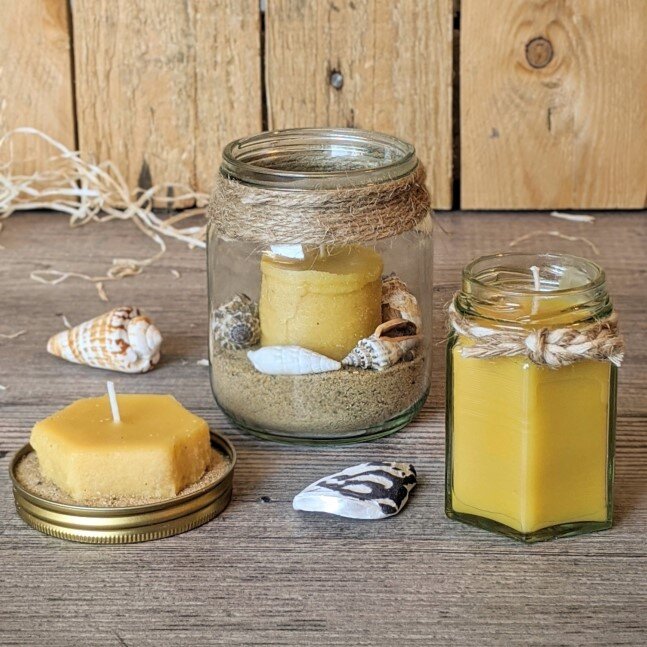
Introducing our latest craft kit
It’s that time again! Every month I dive into a totally new craft and make up a brilliant super cool and totally unique craft kit for you to try. This month I’m making candles! Yay!
Using natural materials
Beeswax
These candles are made from beeswax, the same blocks we use for our beeswax wraps kit. Unlike candles made from other wax, beeswax candles burn brighter and cleaner as they emit negative ions that are known to help purify the air. Beeswax also smells great when burned without any added chemicals or scents, as it’s naturally aromatic from the honey and flower nectar that’s found in the honeycomb.
Shells
I’ve gone to incredible lengths to search for responsibly sourced seashells to decorate one of the candle designs. The majority are from UK waters and from the seafood industry. Many craft shells you’ll find are not sourced responsibly and can be part of widespread habitat destruction. These candles are nice and all but not worth destroying the planet over. So we made a better choice. They are absolutely beautiful and were delivered to me plastic free.
sand Casting
There are many many candle moulds out there made from plastic, silicone and all sorts. I wanted to stick to using natural materials. I also thought of all the candle moulds that have been bought to play with and only ever used once. I really didn’t want to add that that pile of waste so I was really pleased to discover sand casting!
What is sand casting?
Sand casting is just what it sounds like! Casting candles with a mould made from sand! Love making sand castles? Haven’t made it to the beach this summer? You’ve in luck! To make the casts you get the sand “sand castle” wet, then shape it around anything you want the candle to look like. I’ve provided a cardboard tube and a hexagonal jar to use as moulds but you can really use anything solid! Once you’ve made the mould, place your wick in the middle and pour in your molten wax. Let it cool and then you’re done!
Sand cast candle top tips
Be careful - You don’t need to get your wax very hot, in fact the cooler the better. But it’s very easy to forget that 100c is still HOT!
Beware sink holes - These are holes that appear in the middle of your candle after the wax has cooled. They can really mess your candle up so watch out! I’ve tried all the tips to prevent them but found that none of them really work. Best to embrace them! Leave a small amount of wax behind after your first pour then pour the rest into your sink hole later. Solved!
Smooth your casts - Get those sand casts as neat as possible before your pour the wax. Once you pour, there’s no going back!
This kit is now ready to go. It’s amazing! You make 3 totally different candles from a single kit! Want to try? Sign up below and reply to the welcome email asking for this kit!

The journey to plastic free - #3 Eco Craft Kits
For me, creativity and going plastic free go hand in hand

Our Plastic Free Journey - Our Eco Craft Kits
1st July 2020
For me, creativity and going plastic free go hand in hand. Making our own things; decorations, homeware, art, means that we’re not relying on a huge supply chain, we’re more in control of our impact on the planet and more in touch with the true value of things. Homemade is never throw away. That’s why, when I turned my craft workshops into craft kits, I had to lose the plastic and the toxic materials and fully embrace nature.
Today I’m proud to have a range of 8 craft kits (with more on the way) which are all plastic free. Check them out here. I’ve embraced incredible natural materials like avocado dye, earth paint and beeswax to work with nature, not against it.
plastic free Packaging
Our beautiful craft boxes are made from recycled card and shipped in a protective paper bag. To cushion and care for your craft materials we stuff the boxes with sustainably sourced wood wool made from shredded timber which is biodegradable and light weight. Don’t throw it away! It makes awesome kindling or the perfect bed for strawberries if you’re picking or growing them!

Our beautiful boxes

Wood wool packaging
zero plastic Tools
We don’t stop at plastic free packaging. No way! Plastic free tools are beautiful, feel amazing to craft with and last a lifetime! Here’s a little selection of the tools from out kits below.

Natural materials
It’s been really incredible exploring the natural materials available to use creatively! As well as plastic, we’ve cut out all toxic materials like most paint and glue. Chemical paint has been replaced with earth paint and glues are water based. This comes with the benefit that they won’t ruin your hands, clothes or furniture if things get a bit messier than planned!
Some natural materials really are magic! The avocado stones below produce a really rich red wine colour when boiled and can dye fabric a beautiful apricot pink. It’s incredible what nature can provide if you just look.

Why not join in?
Like the idea of crafting that doesn’t cost the earth? Subscribe to Craft Box Club and get a totally different eco craft every month. All our crafts come with video guides so don’t worry, you can’t go wrong! One to one support is also on hand via email, messages or over the phone. We get loads of comments about how great our service is. We really want to look after you on your plastic free journey into creativity!

A Paper Quilling Quest
A beginners guide to quilling…
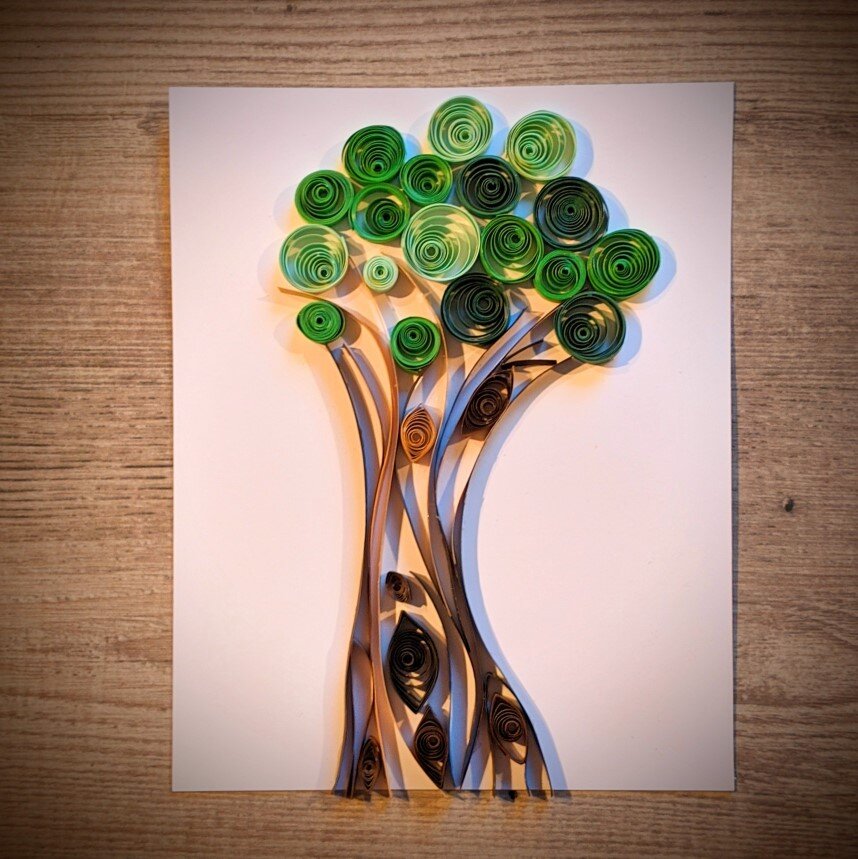
An introduction to Paper Quilling for Beginners
Each month I learn a new craft, create a unique design and make up awesome video guided kits to introduce my wonderful subscribers to a the craft.There’s magic in this method as it means that I have all the mistakes, the hard parts and how to solve problems fresh in my mind. It also means that every month I get to share how it feels to learn a new technique and use it to create something I’m proud of.
Err… what is Paper Quilling?
So, yeah, it sounds like a naughty word right? Anyone else? So quilling is art made from long strips of colourful paper that is often coiled using a quilling needle. You can see the effect you get in the photo at the top of this page. Once the paper is shaped as you want it, you can stick it to the page using pretty much any glue and you get these beautiful 3D pictures.
Why Paper Quilling?
I was attracted to quilling ages ago because of the brightly coloured paper and the amazing range of designs you can make. I’ve had my quilling paper sitting on a shelf for about a year but just never found the time to get making. Since going plastic free at the start of this year I thought paper quilling would be the perfect eco craft kit. But, it was harder than I thought to make this kit plastic free as most of the stuff you can buy is made of plastic and the paper always comes plastic wrapped. Luckily I found someone who will make wooden quilling needles for me, the other half I’m making myself, in house. So exciting!
What’s it like to do?
I loved doing it! I’ve never done it before and I’m pretty happy with my first attempt at the top of the page. It’s really suited to organic forms like trees and flowers as you can use the paper strips to get all the curves of the tree without much fuss. I really can’t draw so I’d find it really tough to get all the curves the way I wanted them using a pencil, but the paper strips are perfect!
Above all, it feels great. Making the paper circles is a lovely action and super relaxing and it’s so beginner friendly. Definitely one to try!
Beginner quilling top tips
Go freestyle - Don’t worry too much about a set design. Do for something organic like trees, leaves or flowers.
Make your paper quills/circles first - before you get into your design, make up a load of circles using your quilling tool so they’re ready to use.
Dip don’t spread - it’s way easier to have a little pool of glue to dip your paper into rather than trying to spread the glue directly onto the paper.
I’m working on a final design and a guide for this craft now so follow me on social media to hear when it’s going live. Once that’s done, the kit will be going out to all my lovely subscribers! Can’t wait for you all to have a go!
The journey to plastic free - #2 First Steps
How we started out on our plastic free creative mission

Our plastic free Journey - first steps
7th June 2020
So it’s been just over a year since Craft Box Club began as an in person craft workshop with a twist, going out to the people, testing ideas and seeing what worked. From the very first day there was no way that I was going to have plastic in the packaging. It just wasn’t happening. I found it really easy to find recycled kraft card boxes and paper fillers to do the job. In fact the brown kraft paper aesthetic has become part of the brand and I really love the look and feel of it.
The problem with “reusable”
I really wanted to bring people an alcohol inks kit. I’d discovered them through a brilliant artist friend of mine and they are just super colourful and fun! They are, however, a nightmare to do plastic free. I settled on using sturdy, reusable plastic pots. After all, the problem is single use plastic right? This will be fine, I told myself. We’ll use them again and again. It never happened! Nobody wants to separate all the kit out at the end of a messy evening of creativity. Everything ended up in the bin and even the ones I tried to recover got stained and was hard to clean without using pure alcohol. Not good for my hands or the environment. Sadly, even though it was super popular, alcohol ink had to go. I just hated throwing so much away that would sit there polluting the planet forever!

I couldn’t keep throwing away so much plastic!
100% plastic free - first try
I was lucky enough to be part of the wonderful Earth Living Festival in Reading. I wanted to set up a safe space for adults to play and be creative without fear. As the festival is all about living lightly on the planet I took up the challenge to make a completely plastic free kit. It was tough. Back then I didn’t have much craft experience or much time so I set about making a salt dough kit. You got 3 different doughs and each was scented with a different essential oil. I still think that’s pretty cool. As I needed to package up the salt dough I ordered hundreds of Vegware tubs. You’ve probably seen Vegware coffee cups and food tubs around a lot. I thought they’d be the perfect thing for my dough! They were advertised as biodegradable. Perfect? Nope! It turns out that they’re only biodegradable when they get industrially composted. So, great for big restaurants who industrially process their food waste. Not so great for me. It turns out that it can’t even be recycled! Really frustrating! It’s a minefield picking through all the different options. Even if your intentions are good, it’s easy to get it wrong.
Next time I’m going to talk about how it all started to come together and I began to produce the beautiful plastic free kits I send out today.
Want to join us on a plastic free, creative adventure?

The journey to plastic free - #1 Why?
Why we’re plastic free

Why go plastic free?
In early 2019 I took a break from my job, to start a quest to do something with more purpose, freedom and fun. I knew so many people, including myself, who wanted to be more creative and learn a craft. My friends and I were struggling with mental health issues, often caused by our work. I wanted to change this. I’d been trying loads of different ways to get creative for a while but really hated craft kits. They contained flimsy tools, gave you no support if you got lost and they were full of plastic packaging and plastic kit. I felt guilty buying them and it was horrible using them.
Like many others I woke up to the madness of plastic pollution in 2018 whilst watching beautiful sea creatures smothered by plastic waste in Blue Planet 2. I gazed in disbelieve as Hugh Fearnley-Whittingstall found mounds of plastic in Malaysia which were meant to be recycled but had clearly been left to rot. Well no, not to rot! To sit there for thousands of years, polluting our planet. I was stunned that even the plastic I thought was recyclable really wasn’t.
What’s wrong with using plastic?
The majority of plastic waste does not get reused or recycled and experts believe that 50% of plastic is single-use, meaning it is used once before being discarded.
Most types of plastic are in fact recyclable, but most municipal governments do not have the infrastructure in place to carry out this energy-intensive process. Recycling plastic not only requires large amounts of energy but also uses large quantities of water.
While getting rid of plastic waste is the primary environmental problem, the production process is a leading cause of carbon emissions contributing to global warming. It takes a lot of energy and resources to make plastic, with more than 90% being produced from fossil fuel resources. Experts believe that if current trends continue, in 30 years’ time 20% of global oil consumption and 15% of global carbon emissions will be associated with plastic production. (Shamelessly copied from here).
Plastic takes thousands of years to biodegrade, taking up valuable landfill space and has a significant detrimental impact on ocean life. Micro-plastics also get into the food chain and even the air we breath causing untold health issues worldwide.
Our challenge
From the start, Craft Box Club has looked to help people find joy in creativity whilst minimising the amount of plastic in our kits, starting with packaging and going totally plastic free in January 2020. This has been and continues to be a serious challenge but also a source of creativity and fun. This series of blogs will tell the story of my challenge and continuous struggle for plastic free creativity. I hope you can join me on this journey and that I’ll inspire you to think more creatively about how you reduce your plastic use and make the most of life on our magical, colourful, vibrant planet.

Adam Roe - Craft Box Club

Earth Paint Love and Salt Dough Top Tips
Do you miss the beach? Me too! Here’s some seaside crafting for you
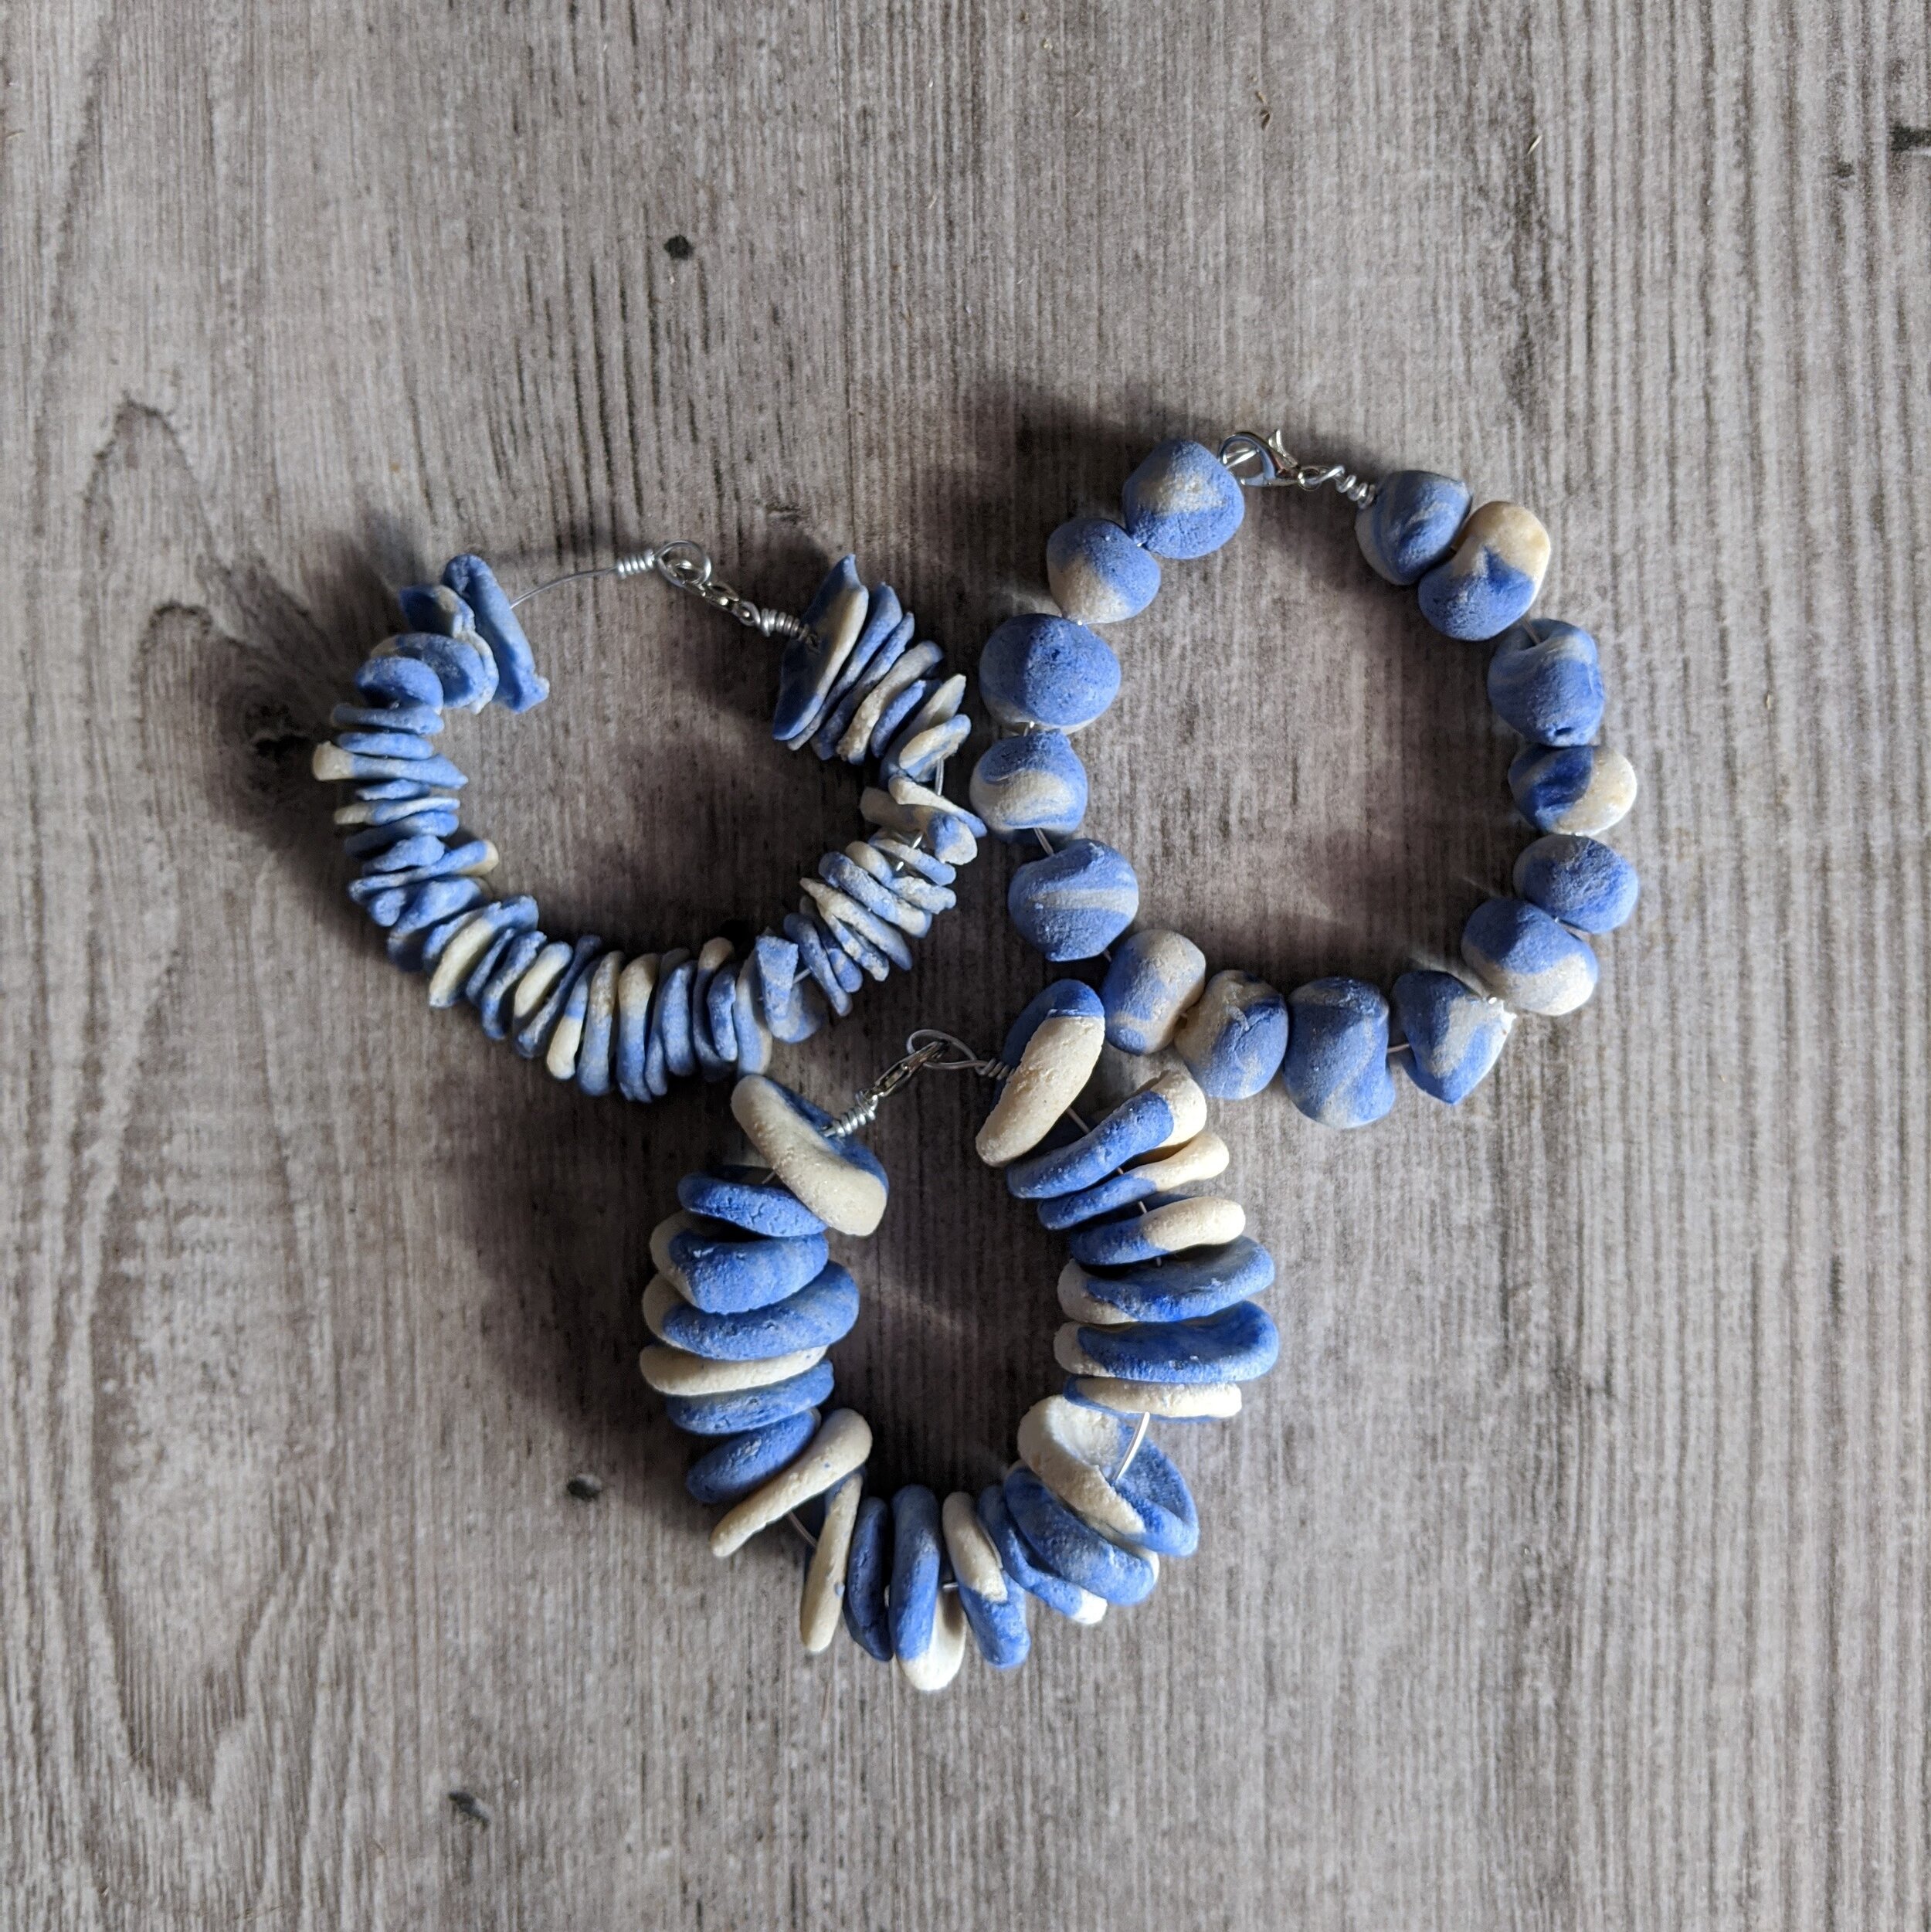
New earth paint & salt dough jewellery kit
I love this kit. Really love it! At Craft Box Club we have an ongoing commitment to plastic free, non-toxic crafting and this kit just fits in perfectly! You make a white and a blue salt dough, then shape different kinds of beads to make three beautiful bracelets.
Introducing EArth Paint
Earth paints are non-toxic powdered paints make from earth minerals. They work really well in our craft kits because they are much easier to package plastic free than traditional liquid paint which need to go in plastic bottles.
This radiant blue pigment is fired to get this vibrant colour. It is composed of 90% earthen clay and 10% man-made, non-toxic minerals, and it is heated in an oven to a high temperature.
Throughout history, blues in nature were very rare and usually made with precious stones like Lapis Lazuli. These stones are now unsustainably harvested in Afghanistan, so we use this beautiful, non-toxic and sustainably-made alternative.
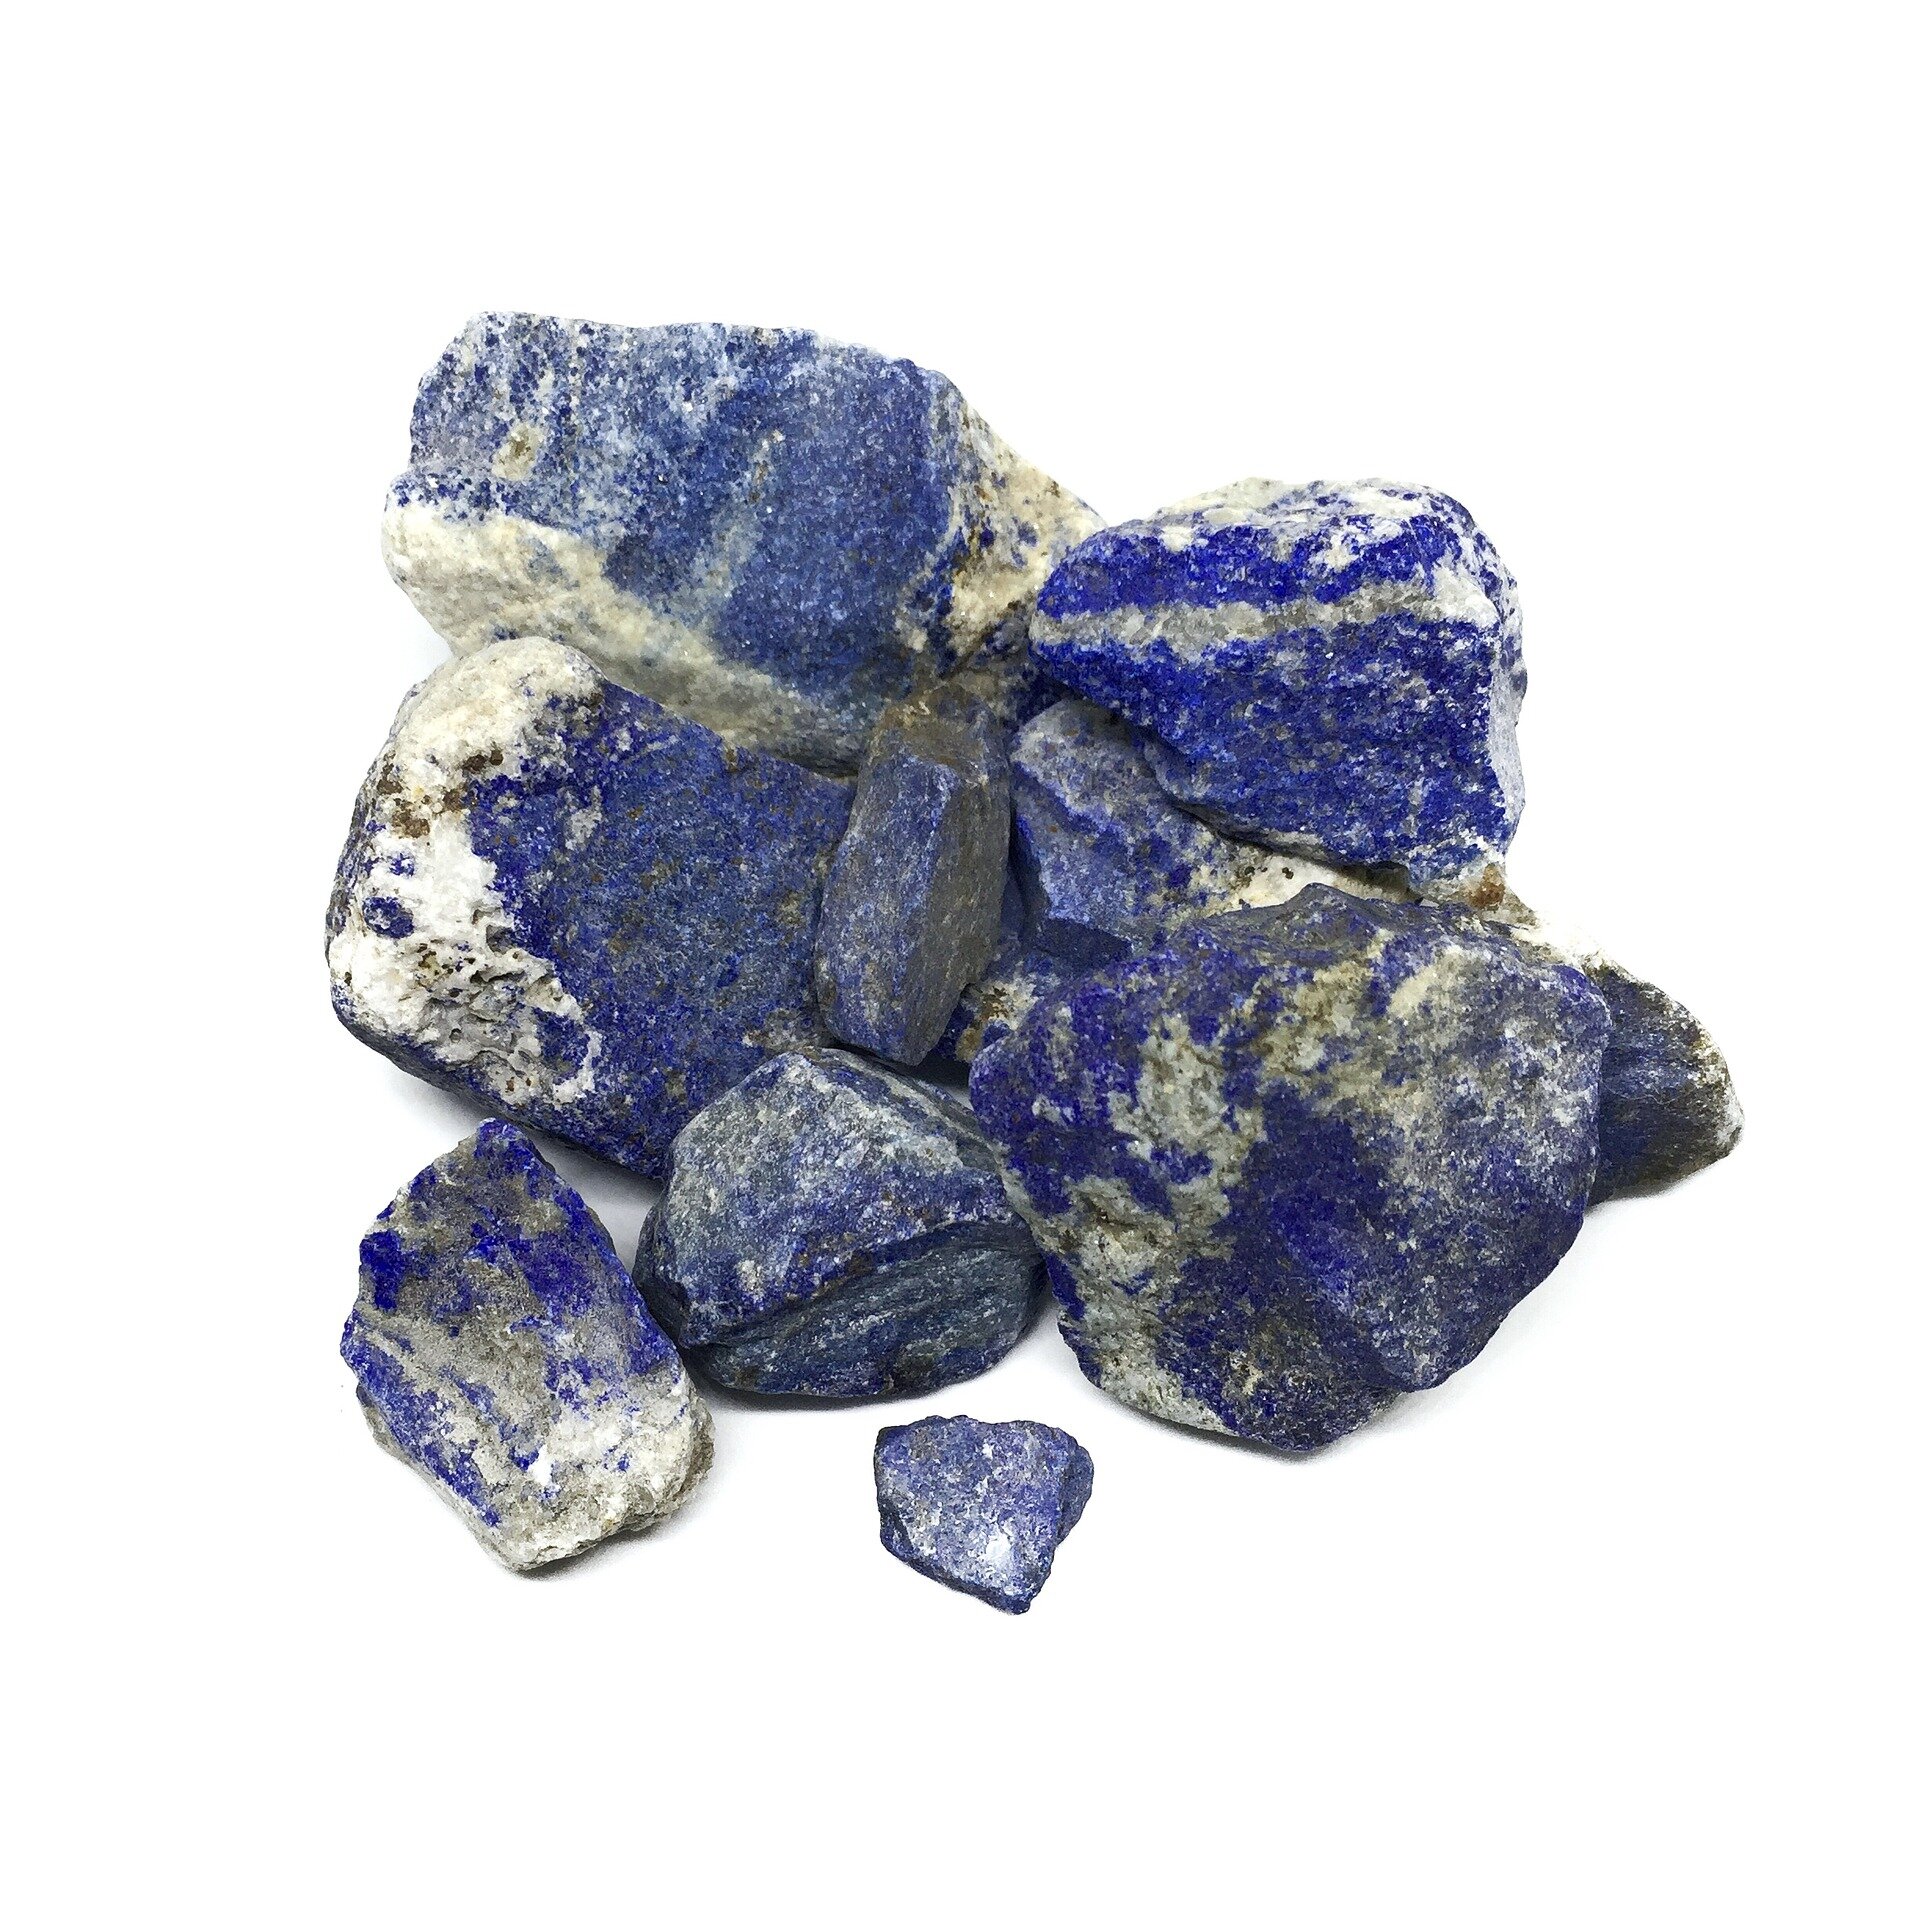
Lapis Lazuli
What inspired this kit?
I love the beach! I don’t live by the sea but a visit to a sandy shoreline really energises me. Every year i set a target of ten beach trips just to make sure it happens. It looks like that might be tough this year with the world in a Corona lock down but I wanted to use the beach as an inspiration for a craft kit. The beads in this kit, the texture of the salt dough and the vivid blue colour all remind me of trips to the sea.

Top tips for salt dough success
Follow the recipe - 2 cups flour, 1 cup salt, 1 cup water.
Knead for a good 10 minutes until the dough is smooth.
Use the dough right away or the gluten relaxes and the dough goes soggy. If you do want to put it aside, leave it in a jam jar and add some more flour to it when you could back to it.
Use plain flour not self raising!
Make a dry dough. Wet dough is harder to handle and won’t keep its shape.
Dry your creations out slowly! For best and more eco-friendly results, dry in the sunshine. Too much heat causes cracks.
If you’re making beads keep an eye on the holes through the middle, the dough swells as it dries and holes close up.
Experiment! You can make so many shapes with salt dough, just keep on creating!
Fancy getting more creative? Join Craft Box Club today and get a totally different craft delivered to your door every month or join our mailing list below and get free creative challenges to do every week!

String Art Adventure
It’s art alchemy
Art alchemy!
When I first decided that Craft Box Club would go fully plastic free I freaked out a little bit. I was already plastic free on the packaging side, that’s never been a huge problem really. But the kit! Would going plastic free really limit the range of crafts that I was able to offer? Would I be able to keep the ideas coming? Well the answer was a big fat NO! I sat down and wrote a list of plastic free crafts that I really wanted to try, and I got to 15 in just a couple of minutes and this craft, string art, wasn’t even on there!
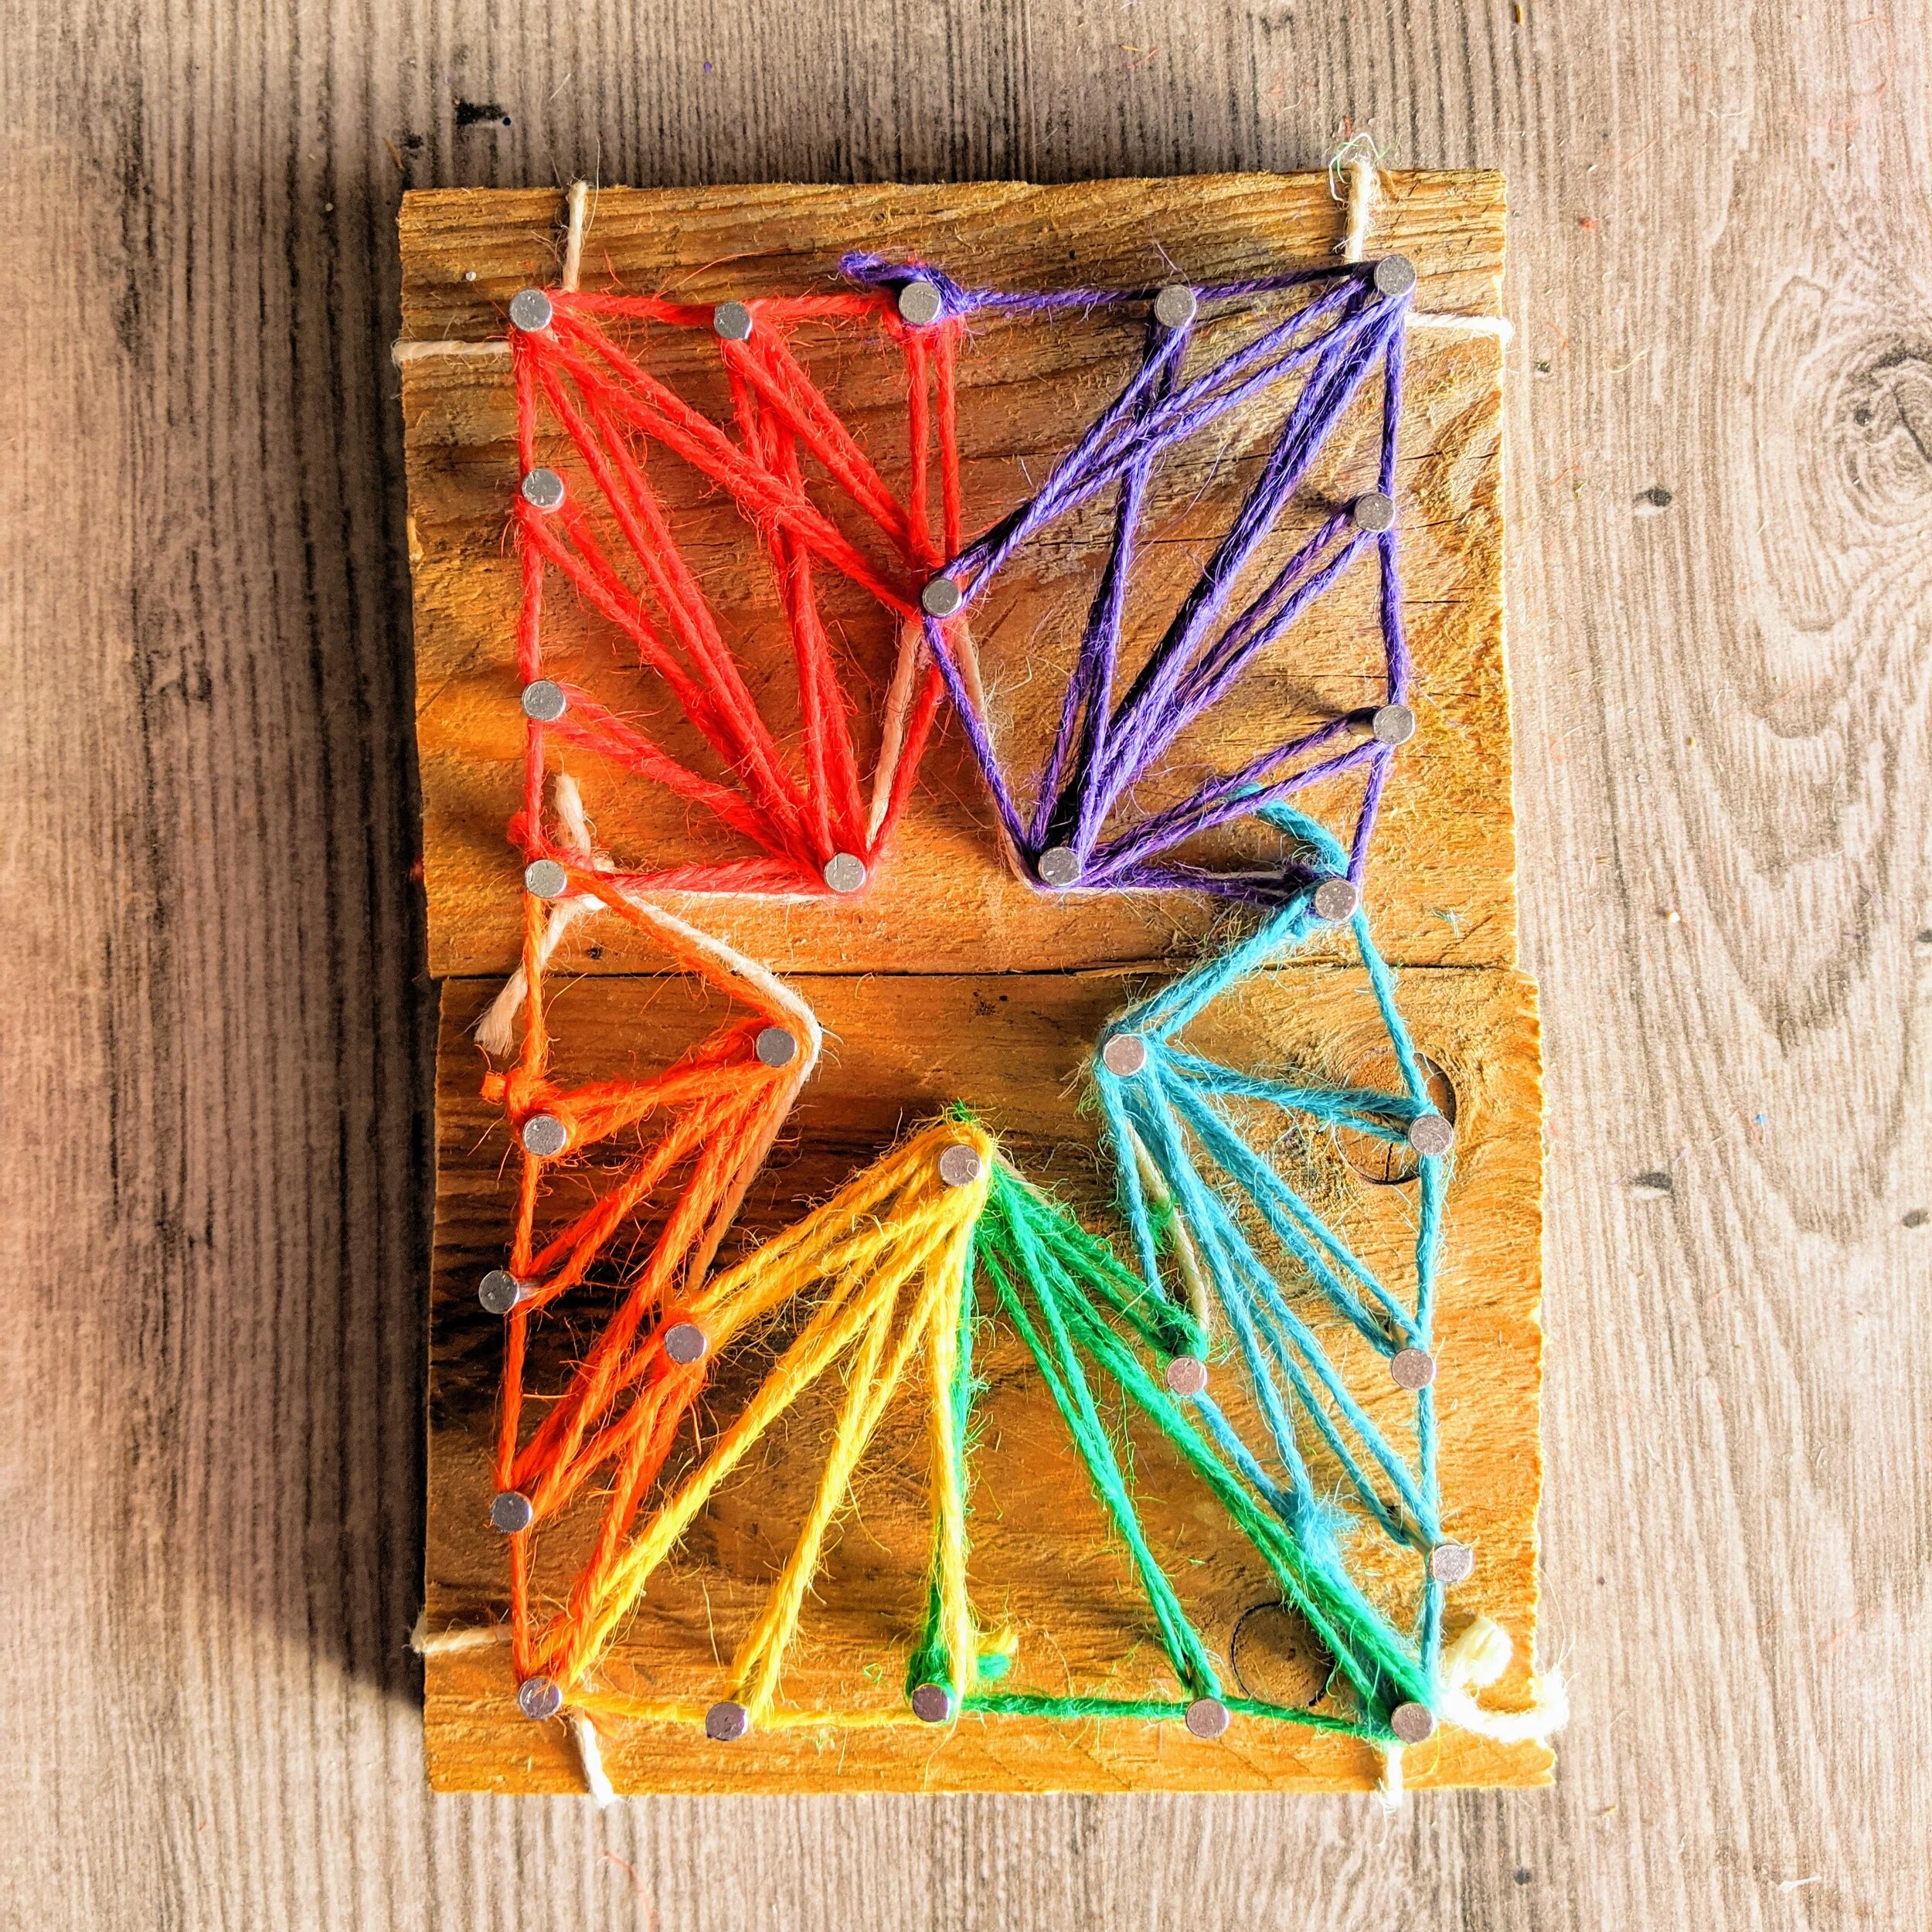
String art
I’ve got to thanks London studio Make Your Own for the inspiration. I saw this craft demonstrated on an Instagram live and I fell in love. The idea is super simple, all you need is nails, string and wood and you can make an epic piece of art! Real art alchemy! I’ve had quite a few experiments with this now, and it’s been great fun. The image above is my latest creation. Not all there yet but I’ve got the design down now. The next go will the the final design that will go into the kit.
If you’re thinking of having a go at string art here are my top tips. All of these will make it into the final string art video guide, coming soon.
String art top tips
Plan it out - You might notice that my creation is a bit wonky. For the final kit I’m going to make a template so all the lines are straight and it’ll really tighten up the final look!
Keep it simple - The simplest designs are definitely the best. Let the texture and the colour do the talking
Get that string tight - The whole design relies on nice straight lines. Don’t let those strings go floppy!
Hammer the nails in firm - I’ve had some disasters where I tried to pull the string tight and pulled out a nail! Really annoying!
Get the right kit - You need to make sure that the nails you’re using are the right length, about 2cm is good, and the wood is not too hard. You need a good solid hammer too. If you’d like us to do the hard work and send the kit right to your door, then join the club and ask for this kit when you get your welcome email.
What now?
I can’t wait to get going on making the video for this craft. I’m having to wait a bit longer for deliveries than usual at the moment but I’m still aiming to have this ready for next month!
Looking forward to sharing the kit with you all. In the spirit of Craft Box Club, I’ll be using recycled wooden pallets so I need to get sawing!
Happy crafting everyone!
Inspired?
It feels awesome getting creative, using your hands and getting off your phone. All our kits are simple and beginner friendly! Ready for your mini art adventure. Join Craft Box Club below…

Introducing the Washi tape coaster kit
Instant coasters with your own unique design!

Hot off the press, I’m pleased to be introducing the new Washi tape coasters craft kit! Coming soon to subscribers across the UK.
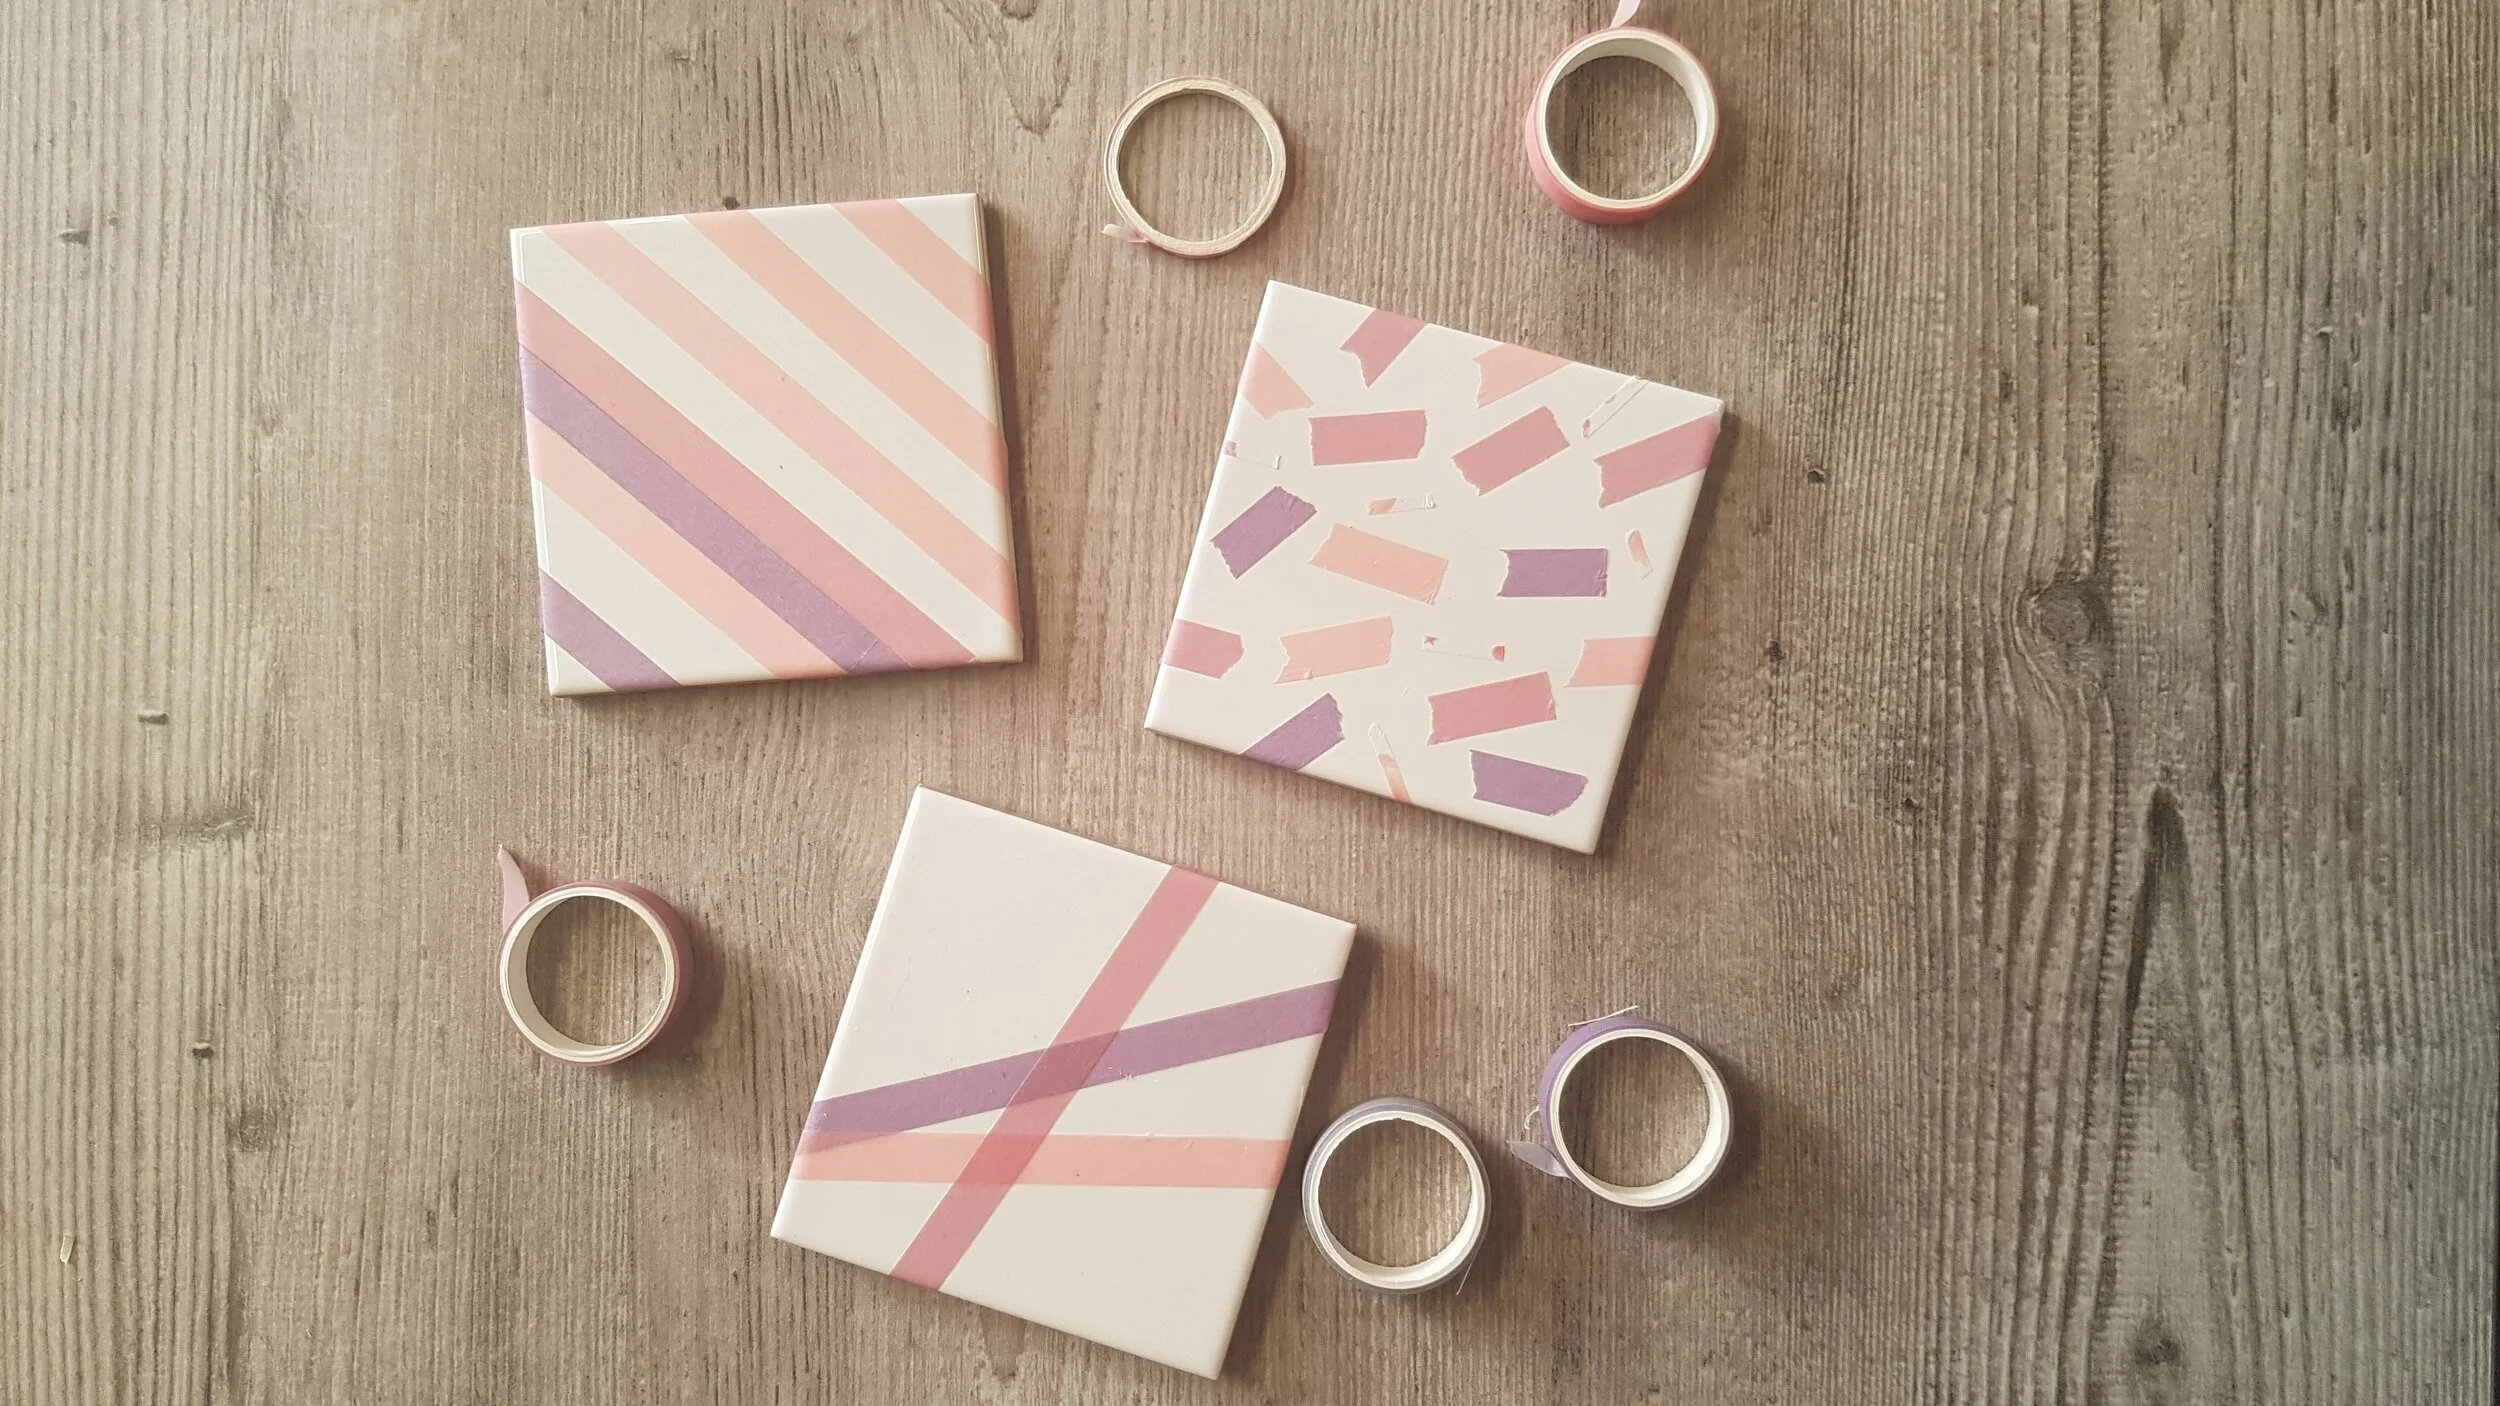
I just love how this kit looks. The mix of natural colours and textures with the bright white tiles and the flash of the tin looks great against the colour pops from the Washi tape.
Errr what is Washi tape, I hear you scream! It is a decorative tape made out of rice paper. Originally from Japan and now every scrapbookers best friend, Washi tape is my new favourite thing. It comes in all the colours of the rainbow, and some awesome patterns too. It is commonly used in art and craft projects, particularly paper crafts.
With this kit, you can play with designs until you’re happy with them. Then, just brush on the sealer and you’ve just created your own unique set of coasters.
Washi Tape, or Japanese masking tape, first originated in Japan by the business Kamoi Kakoshi Co., Ltd. under the name MT masking tape. It all started in 2006 when puzzled Kamoi received an email from a little group of women who developed a book making use of their industrial masking tape. The email stated that they would like to tour their facility before working on a second book utilizing their masking tapes. Confused Kamoi didn’t initially respond to this curious email, and later received a package from the ladies; It contained colourful, beautifully designed pages all carried out in masking tape! Kamoi ultimately agreed to let the ladies tour their facility, and their marvel and fascination at the tape creating process filled Kamoi with fantastic pride. Later, they received a second book filled with a lot more stunning pages from 17 different artists, all employing their masking tape to develop a thing of beauty! The women requested that Kamoi produce much more masking tape colours. Kamoi didn’t hesitate after a big art exhibition in Tokyo and plenty of media coverage; they took the plunge and began to work on producing the excellent rolls to use for crafts and design! They not only created numerous far more colours, but also designs that were cute and functional.
These are my very own set of coasters, the first couple I made. They’re now a permanent feature in the studio! Might have to make more for around the house too!
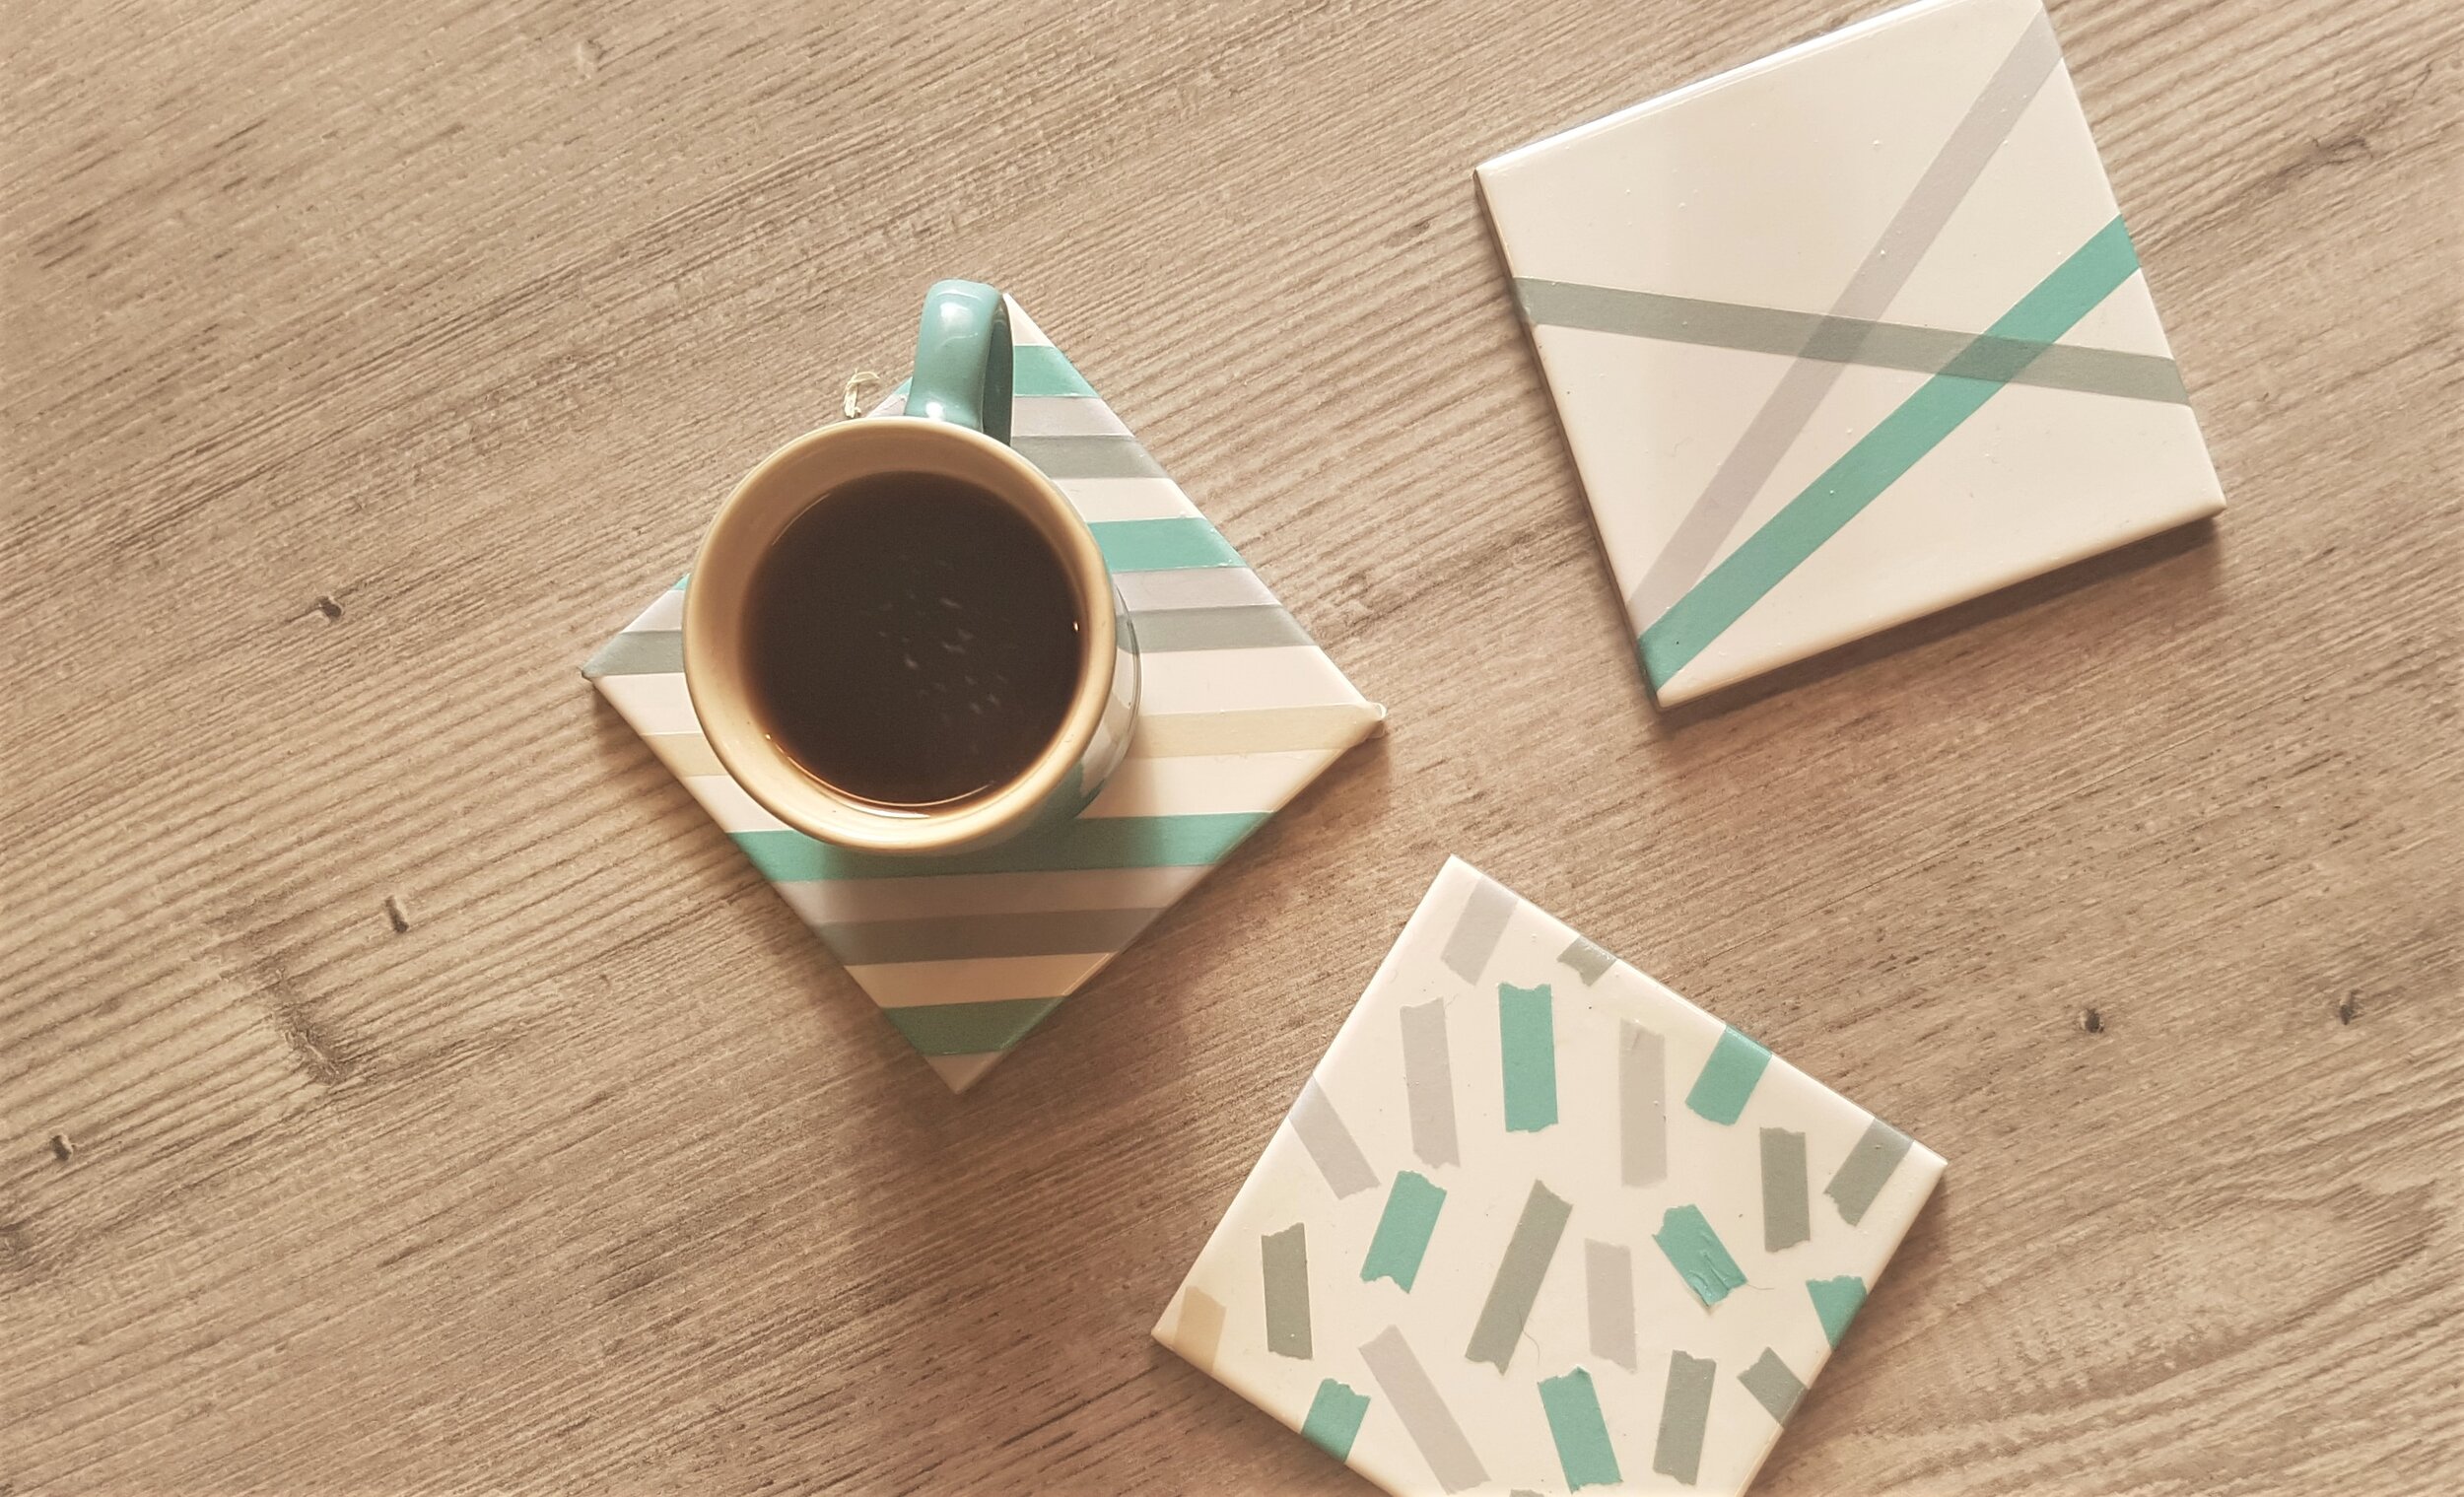
Is it just me of does one of the designs remind you of sprinkles on a doughnut? Mmmm, doughnut anyone?
Fancy having a go at using the kit. Sign up to Craft Box Club and receive simple, plastic free craft kits in the post every month.