
New kit! - Sand Cast Candles
Introducing our latest amazing craft kit!
Introducing our latest craft kit
It’s that time again! Every month I dive into a totally new craft and make up a brilliant super cool and totally unique craft kit for you to try. This month I’m making candles! Yay!
Using natural materials
Beeswax
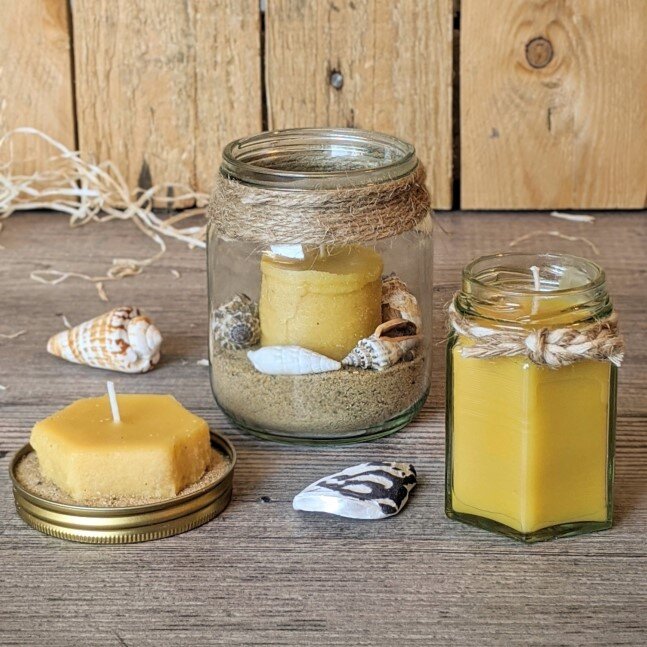
These candles are made from beeswax, the same blocks we use for our beeswax wraps kit. Unlike candles made from other wax, beeswax candles burn brighter and cleaner as they emit negative ions that are known to help purify the air. Beeswax also smells great when burned without any added chemicals or scents, as it’s naturally aromatic from the honey and flower nectar that’s found in the honeycomb.
Shells
I’ve gone to incredible lengths to search for responsibly sourced seashells to decorate one of the candle designs. The majority are from UK waters and from the seafood industry. Many craft shells you’ll find are not sourced responsibly and can be part of widespread habitat destruction. These candles are nice and all but not worth destroying the planet over. So we made a better choice. They are absolutely beautiful and were delivered to me plastic free.
sand Casting
There are many many candle moulds out there made from plastic, silicone and all sorts. I wanted to stick to using natural materials. I also thought of all the candle moulds that have been bought to play with and only ever used once. I really didn’t want to add that that pile of waste so I was really pleased to discover sand casting!
What is sand casting?
Sand casting is just what it sounds like! Casting candles with a mould made from sand! Love making sand castles? Haven’t made it to the beach this summer? You’ve in luck! To make the casts you get the sand “sand castle” wet, then shape it around anything you want the candle to look like. I’ve provided a cardboard tube and a hexagonal jar to use as moulds but you can really use anything solid! Once you’ve made the mould, place your wick in the middle and pour in your molten wax. Let it cool and then you’re done!
Sand cast candle top tips
Be careful - You don’t need to get your wax very hot, in fact the cooler the better. But it’s very easy to forget that 100c is still HOT!
Beware sink holes - These are holes that appear in the middle of your candle after the wax has cooled. They can really mess your candle up so watch out! I’ve tried all the tips to prevent them but found that none of them really work. Best to embrace them! Leave a small amount of wax behind after your first pour then pour the rest into your sink hole later. Solved!
Smooth your casts - Get those sand casts as neat as possible before your pour the wax. Once you pour, there’s no going back!
This kit is now ready to go. It’s amazing! You make 3 totally different candles from a single kit! Want to try? Sign up below and reply to the welcome email asking for this kit!

A Paper Quilling Quest
A beginners guide to quilling…
An introduction to Paper Quilling for Beginners
Each month I learn a new craft, create a unique design and make up awesome video guided kits to introduce my wonderful subscribers to a the craft.There’s magic in this method as it means that I have all the mistakes, the hard parts and how to solve problems fresh in my mind. It also means that every month I get to share how it feels to learn a new technique and use it to create something I’m proud of.
Err… what is Paper Quilling?
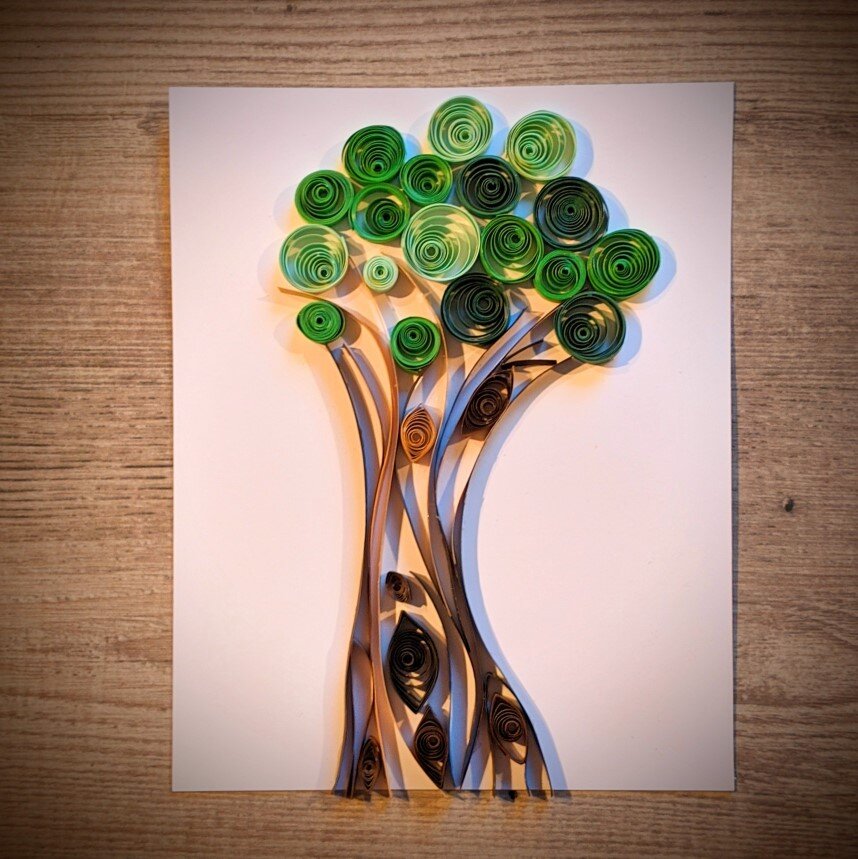
So, yeah, it sounds like a naughty word right? Anyone else? So quilling is art made from long strips of colourful paper that is often coiled using a quilling needle. You can see the effect you get in the photo at the top of this page. Once the paper is shaped as you want it, you can stick it to the page using pretty much any glue and you get these beautiful 3D pictures.
Why Paper Quilling?
I was attracted to quilling ages ago because of the brightly coloured paper and the amazing range of designs you can make. I’ve had my quilling paper sitting on a shelf for about a year but just never found the time to get making. Since going plastic free at the start of this year I thought paper quilling would be the perfect eco craft kit. But, it was harder than I thought to make this kit plastic free as most of the stuff you can buy is made of plastic and the paper always comes plastic wrapped. Luckily I found someone who will make wooden quilling needles for me, the other half I’m making myself, in house. So exciting!
What’s it like to do?
I loved doing it! I’ve never done it before and I’m pretty happy with my first attempt at the top of the page. It’s really suited to organic forms like trees and flowers as you can use the paper strips to get all the curves of the tree without much fuss. I really can’t draw so I’d find it really tough to get all the curves the way I wanted them using a pencil, but the paper strips are perfect!
Above all, it feels great. Making the paper circles is a lovely action and super relaxing and it’s so beginner friendly. Definitely one to try!
Beginner quilling top tips
Go freestyle - Don’t worry too much about a set design. Do for something organic like trees, leaves or flowers.
Make your paper quills/circles first - before you get into your design, make up a load of circles using your quilling tool so they’re ready to use.
Dip don’t spread - it’s way easier to have a little pool of glue to dip your paper into rather than trying to spread the glue directly onto the paper.
I’m working on a final design and a guide for this craft now so follow me on social media to hear when it’s going live. Once that’s done, the kit will be going out to all my lovely subscribers! Can’t wait for you all to have a go!