
GETTING STARTED WITH MACRAME
In today’s fast-paced world, many people are seeking ways to slow down, unwind, and tap into their creative side. Macramé, the art of knotting cords into beautiful patterns, offers just that. With its roots tracing back centuries, macramé has seen a resurgence in popularity in recent years, captivating crafters of all ages with its simplicity and versatility. If you’re looking to embark on a journey of creativity and relaxation, then you’ve come to the right place.
The Ultimate Eco-Craft?
Yes I really think it could be! It’s crafting alchemy, with just a few simple knots you turn humble string or rope into beautiful and often super useful creations. We know that it can look really tricky to get started though, so let’s dive in and get you excited to start your first project!
Where to start?
In this beginner’s guide, we’ll unravel the basics of macramé and provide you with the knowledge and inspiration you need to get started on your own macramé projects.
Understanding Macramé
To begin your macramé journey, it’s essential to understand the basics of this ancient craft. Macramé originated in the 13th century among Arabic weavers and sailors who used knotting techniques to create decorative fringes on textiles and secure items aboard ships. Over time, macramé evolved into an art form, with intricate patterns and designs emerging across various cultures.
Today, macramé is primarily practiced using cords made of cotton, hemp, jute, or synthetic materials. The beauty of macramé lies in its simplicity – all you need are your hands, some cord, and a few basic knots to create stunning pieces of art. I also find a tin of beans to be pretty handy too, but we’ll get to that later.
Essential Tools and Materials
Before diving into your first macramé project, it’s important to gather the necessary tools and materials. Here’s what you’ll need to get started:
Macramé Cord: Choose a cord that suits your project’s aesthetic and purpose. Cotton cord is soft and pliable, making it ideal for beginners, while jute or hemp cord adds a rustic touch to your creations.
Scissors: A sharp pair of scissors is essential for cutting your cord cleanly and accurately.
Tape Measure: To ensure your macramé piece turns out just right, a tape measure will help you maintain consistent measurements. Of course, all our craft kits come with everything you need for your make all measured out for you!
Macramé Board or Workspace: While not essential, a macramé board or workspace will help keep your cords organized and prevent them from tangling as you work.
Optional Embellishments: Depending on your project, you may want to incorporate beads, feathers, or other embellishments to add flair to your macramé creations.
Comb: For some projects you need to fray the cord at the ends to get a lovely cascading effect. It can help to have a medium tooth comb to help you do this
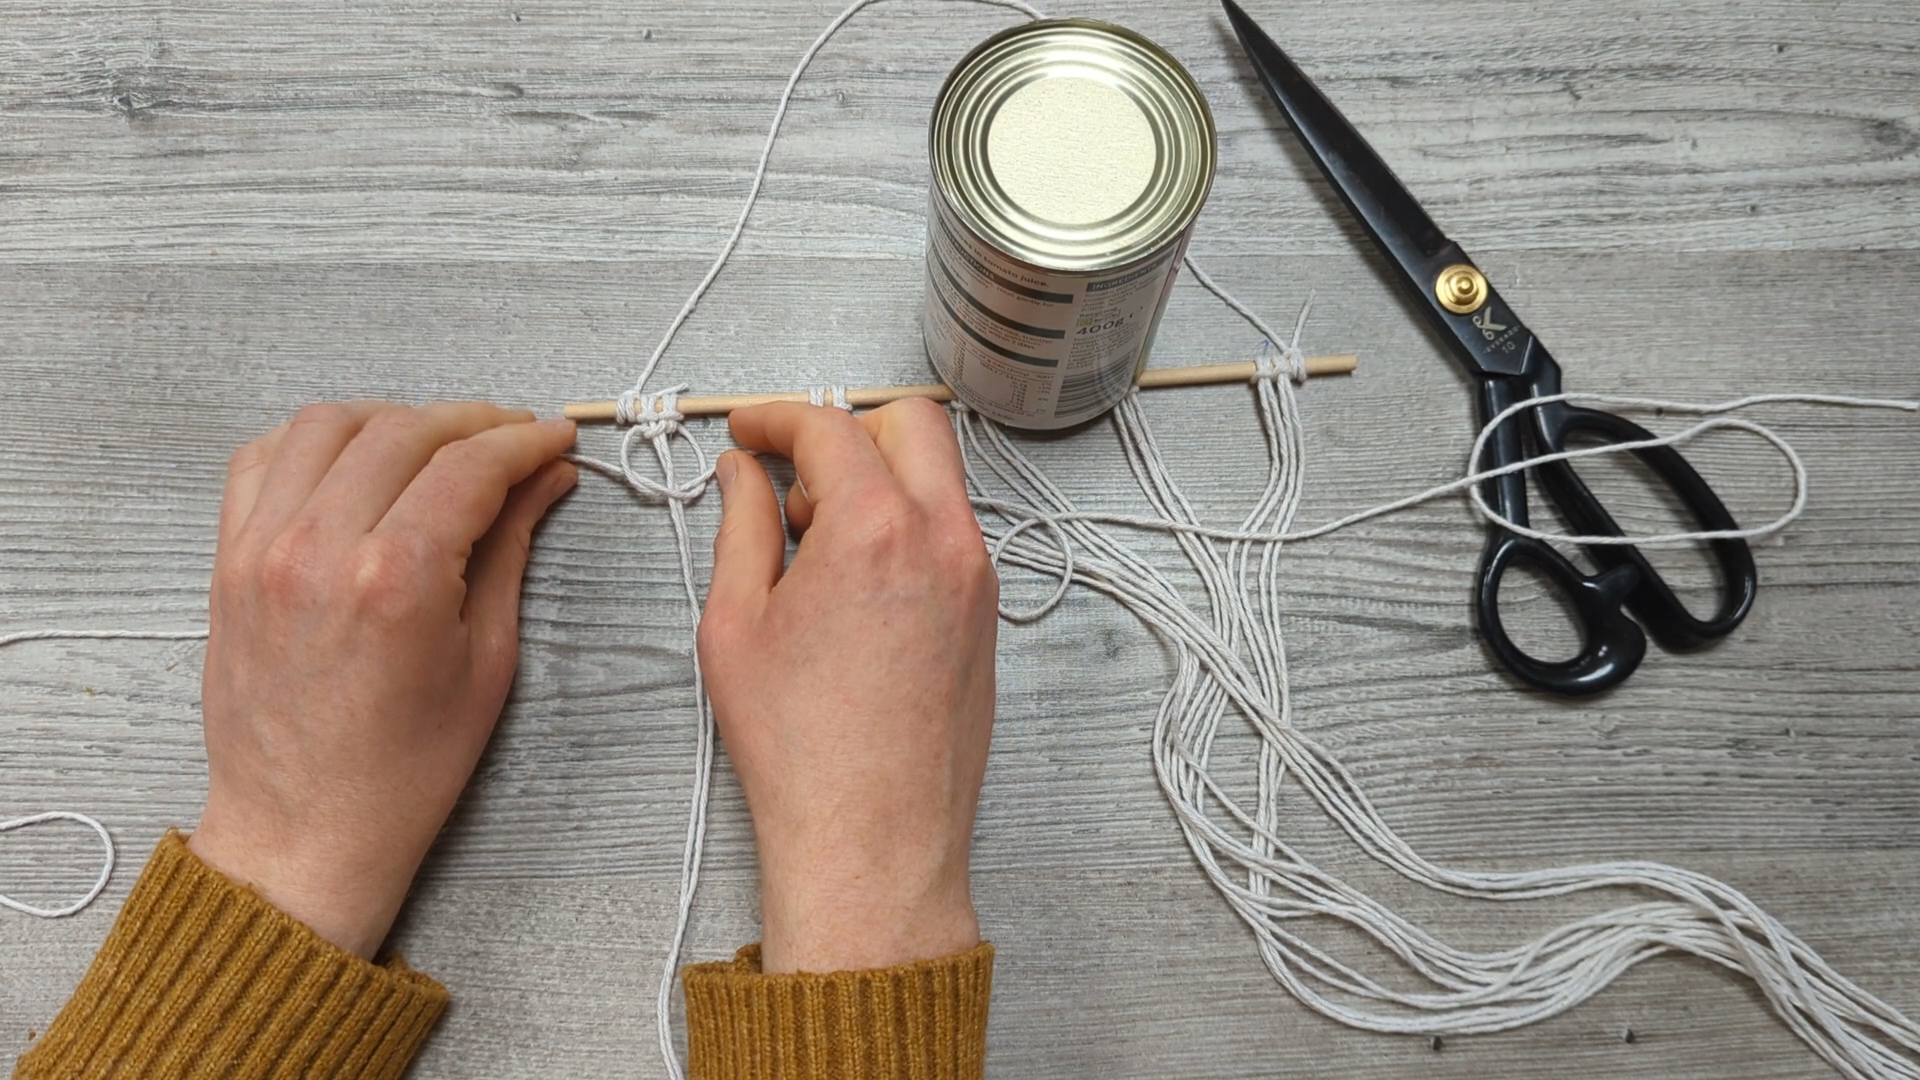
Oh yes, and here’s where the beans come in. I find it really useful to have a nice heavy tin of something to weight your creation down while you’re making it to keep everything in place. Above, I’ve included a clip from one of our guides showing the all important tin in use!
Basic Knots

Introducing our Eco-Friendly Macramé Photo Hanger Craft Kit – the perfect blend of creativity, sustainability, and nostalgia. Crafted with love and respect for the environment, this kit allows you to create a stunning photo display while reducing your ecological footprint.
What you’ll love:
Plastic-Free Crafting: We believe in plastic-free. Our kit includes high-quality, natural materials that are not only aesthetically pleasing but also eco-conscious. Say goodbye to plastic waste and hello to a greener, more sustainable crafting experience.
Comprehensive Video & Photo Guide: Whether you're a crafting novice or an experienced DIY enthusiast, our step-by-step video guide ensures a smooth and enjoyable crafting process. Follow along at your own pace, pausing and rewinding as needed, to create a beautiful macramé photo hanger that showcases your cherished memories.
Beautiful and Unique Design: Elevate your space with a handcrafted masterpiece. The design of our macramé photo hanger is not only functional but also visually stunning. The intricate knots and patterns add a touch of bohemian charm to your home, making it a stylish and unique addition to any room.
Show Off Your Retro Photos: Rediscover the joy of retro photography by displaying your favourite snapshots in a creative and personalized way. The macramé photo hanger provides a perfect backdrop for showcasing your memories, turning them into a focal point that sparks conversations and nostalgia.
Eco-Friendly Packaging: Our commitment to sustainability goes beyond the product itself. The kit is packaged using eco-friendly materials, minimizing waste and environmental impact. Feel good about your purchase knowing that every aspect has been designed with the planet in mind.
Crafting has never been this fulfilling and eco-conscious. Bring a touch of boho-chic to your living space with our Macramé Photo Hanger Craft Kit. Unleash your creativity, showcase your retro photos, and make a positive impact on the planet – all in one delightful package. Order yours today and embark on a journey of mindful crafting!
The foundation of macramé lies in its knots. While there are countless knotting techniques, mastering a few basic knots will allow you to create a wide variety of patterns and designs. Here are some essential knots to get you started:
Square Knot: The square knot is the building block of many macramé patterns. It consists of two half-square knots, one tied right over left and the other left over right. As an example, the photo hanger kit shown here uses square knots to create the lattice pattern.
Lark’s Head Knot: This simple knot is used to attach your cord to a dowel or ring, creating the starting point for many macramé projects.
Half Hitch Knot: The half hitch knot is created by looping one cord around another and pulling it through to create a knot. It’s commonly used to add texture and depth to your macramé designs.
All of our video guides take you through these knots nice and slowly so you’ll know what you’re doing.
BEGINNER PROJECTS
Now that you’ve familiarized yourself with the basics of macramé, it’s time to dive into your first project. Here are a few beginner-friendly projects to help you hone your skills:

It’s a classic macrame make and a beautiful addition to your home or garden! We’re with you every step of the way through this make with video and photo guides. You’ll learn 3 crucial macrame knots that are super useful if you want to take your macrame journey even further. Enjoy!
WHAT YOU GET
Plant pot
Pre cut natural macrame twine
Wooden beads
Top tips sheet and step-by-step easy to follow video guide.
Includes UK shipping. Instant dispatch!
Plant Hanger: Create a stylish home for your favourite houseplants by crafting a macramé plant hanger. This project is perfect for practicing your square knots and can be customized to fit pots of various sizes.
Wall Hanging: Express your creativity by designing a custom macramé wall hanging. Experiment with different knot patterns and embellishments to create a unique piece of art for your home.
Keychain: For a quick and easy project, try making a macramé keychain. This miniature project is perfect for practicing your knotting skills on a smaller scale and makes a charming accessory for your keys or bag. Our Semilna kit comes with a wall hanging and a keychain so that’s a great way to get started!
Troubleshooting Tips
As with any new skill, you may encounter challenges along the way. Here are some troubleshooting tips to help you overcome common macramé pitfalls:
Tangled Cords: Keep your cords organized by using a macramé board or workspace to prevent tangling as you work.
Uneven Knots: Achieving uniform knots takes practice. Take your time and focus on maintaining consistent tension to create neat and tidy knots.
Experimentation is Key: Don’t be afraid to experiment with different knot patterns, cord thicknesses, and embellishments to discover your unique macramé style.
Congratulations! You’ve completed your crash course in macramé and are ready to unleash your creativity on the world. Whether you’re crafting plant hangers, wall hangings, or keychains, the possibilities are endless with macramé. So grab your cord, tie those knots, and let your imagination run wild. Happy knotting!
If you’re keen to try macramé for the first time, a craft kit is a great option. You’ll get all the right cord for your project with everything cut to the right size. We also provide you with easy to follow photo and video guides so you can see exactly what to do. Take your first step into learning a great new skill and click the link below…